Making Meat Stock with the InstantPot

I call it meat stock. I make with beef bones, chicken bones, pork bones, sometimes a mix of all 3, sometimes its beef and pork. I was pretty happy when someone actually called it meat stock in her cookbook- I wasn’t alone and I wasn’t all that weird either.

I cook a lot with stock, maybe you call it broth…….

I could cook it all day on the stove or in a slow cooker. I now use an InstantPot. I usually use the Instantpot just for stock sometimes I may do a roast in it or a stew or a soup or some dried beans. But really it’s stock.

DIRECTIONS

I have an 8 quart Instant pot so it makes a bit more than the average 6 quart. So that might need a little less bones. See how it works for you.

ivaG59USRd6vvcqM%GDLXg.jpg

INGREDIENTS

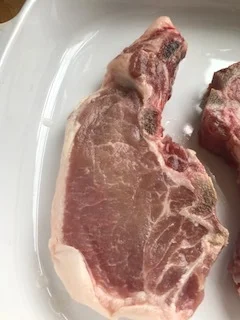
2-3 pounds of bones. Often it’s a mix of beef bones and pork bones with some chicken bones. Or do just one. Or a mix of whatever you have. We don’t eat lamb but they would work well too. Just use the bones and extract great flavor and extra vitamins. Stop buying the unknown crap at the store!

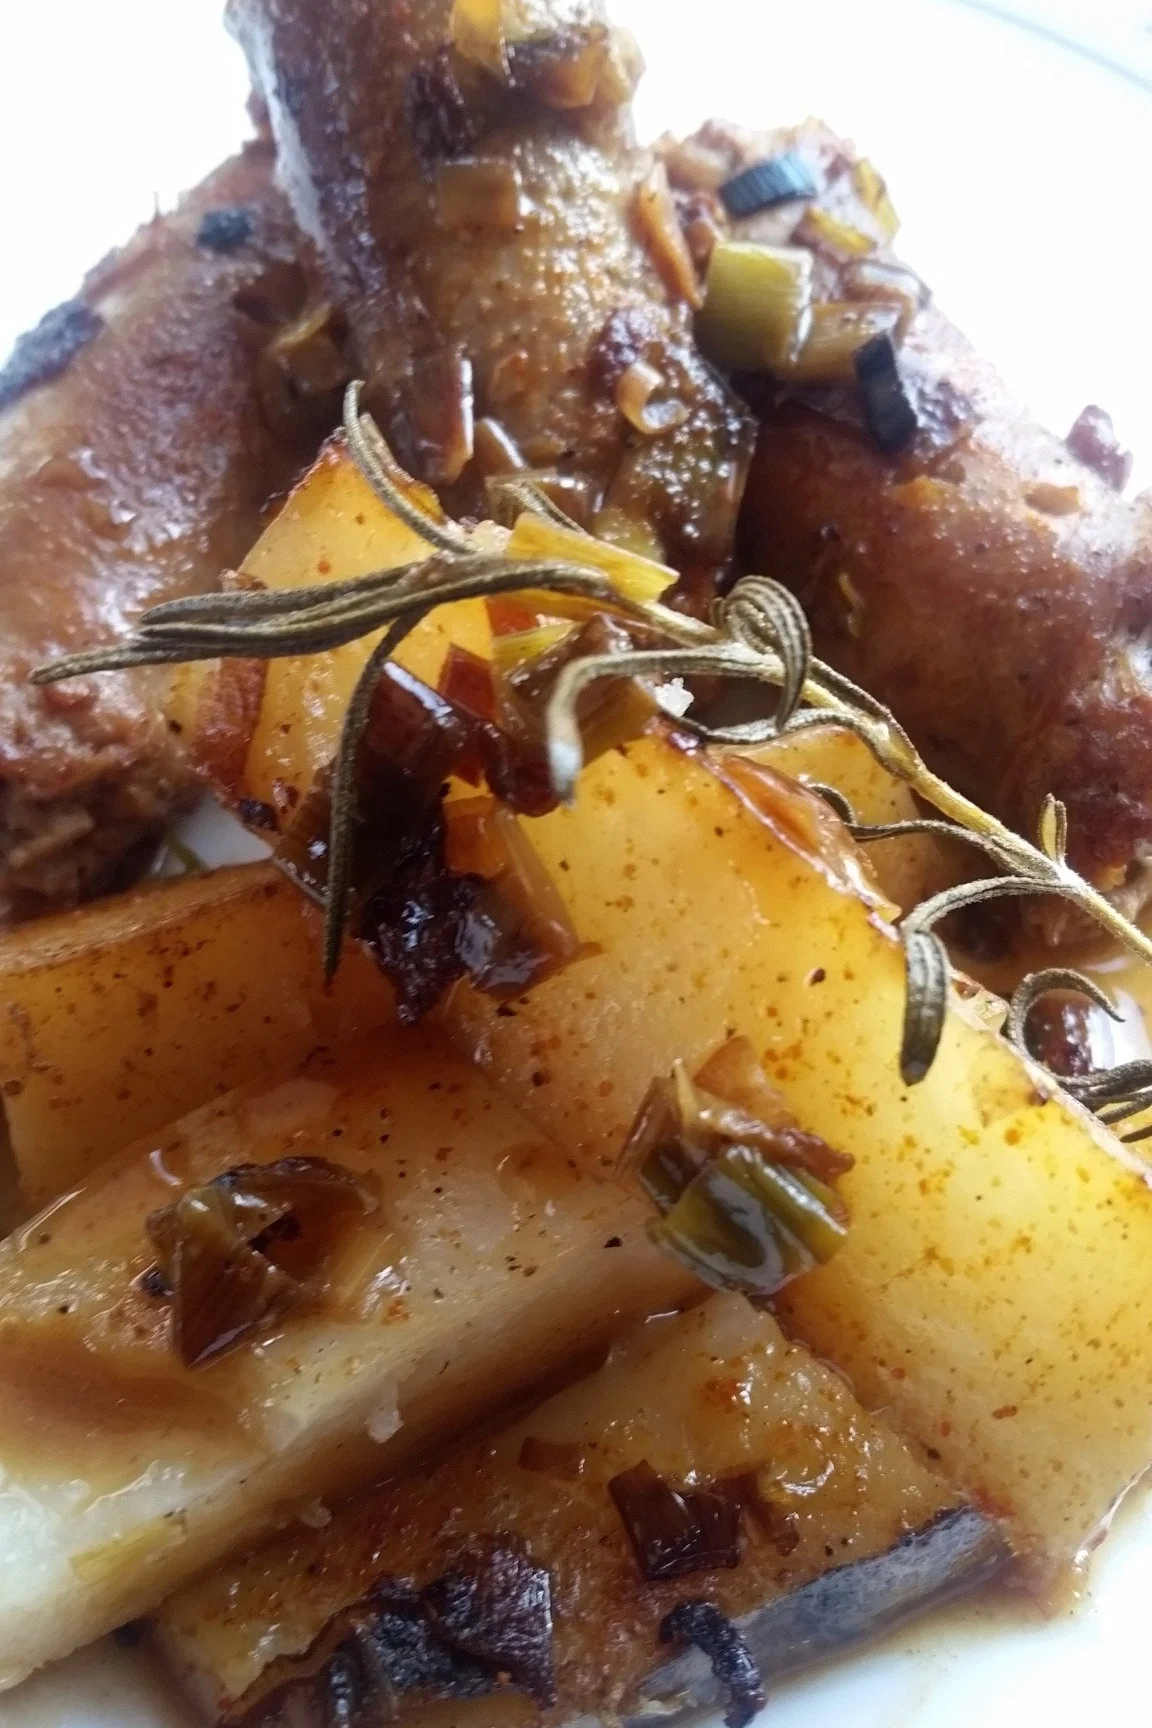
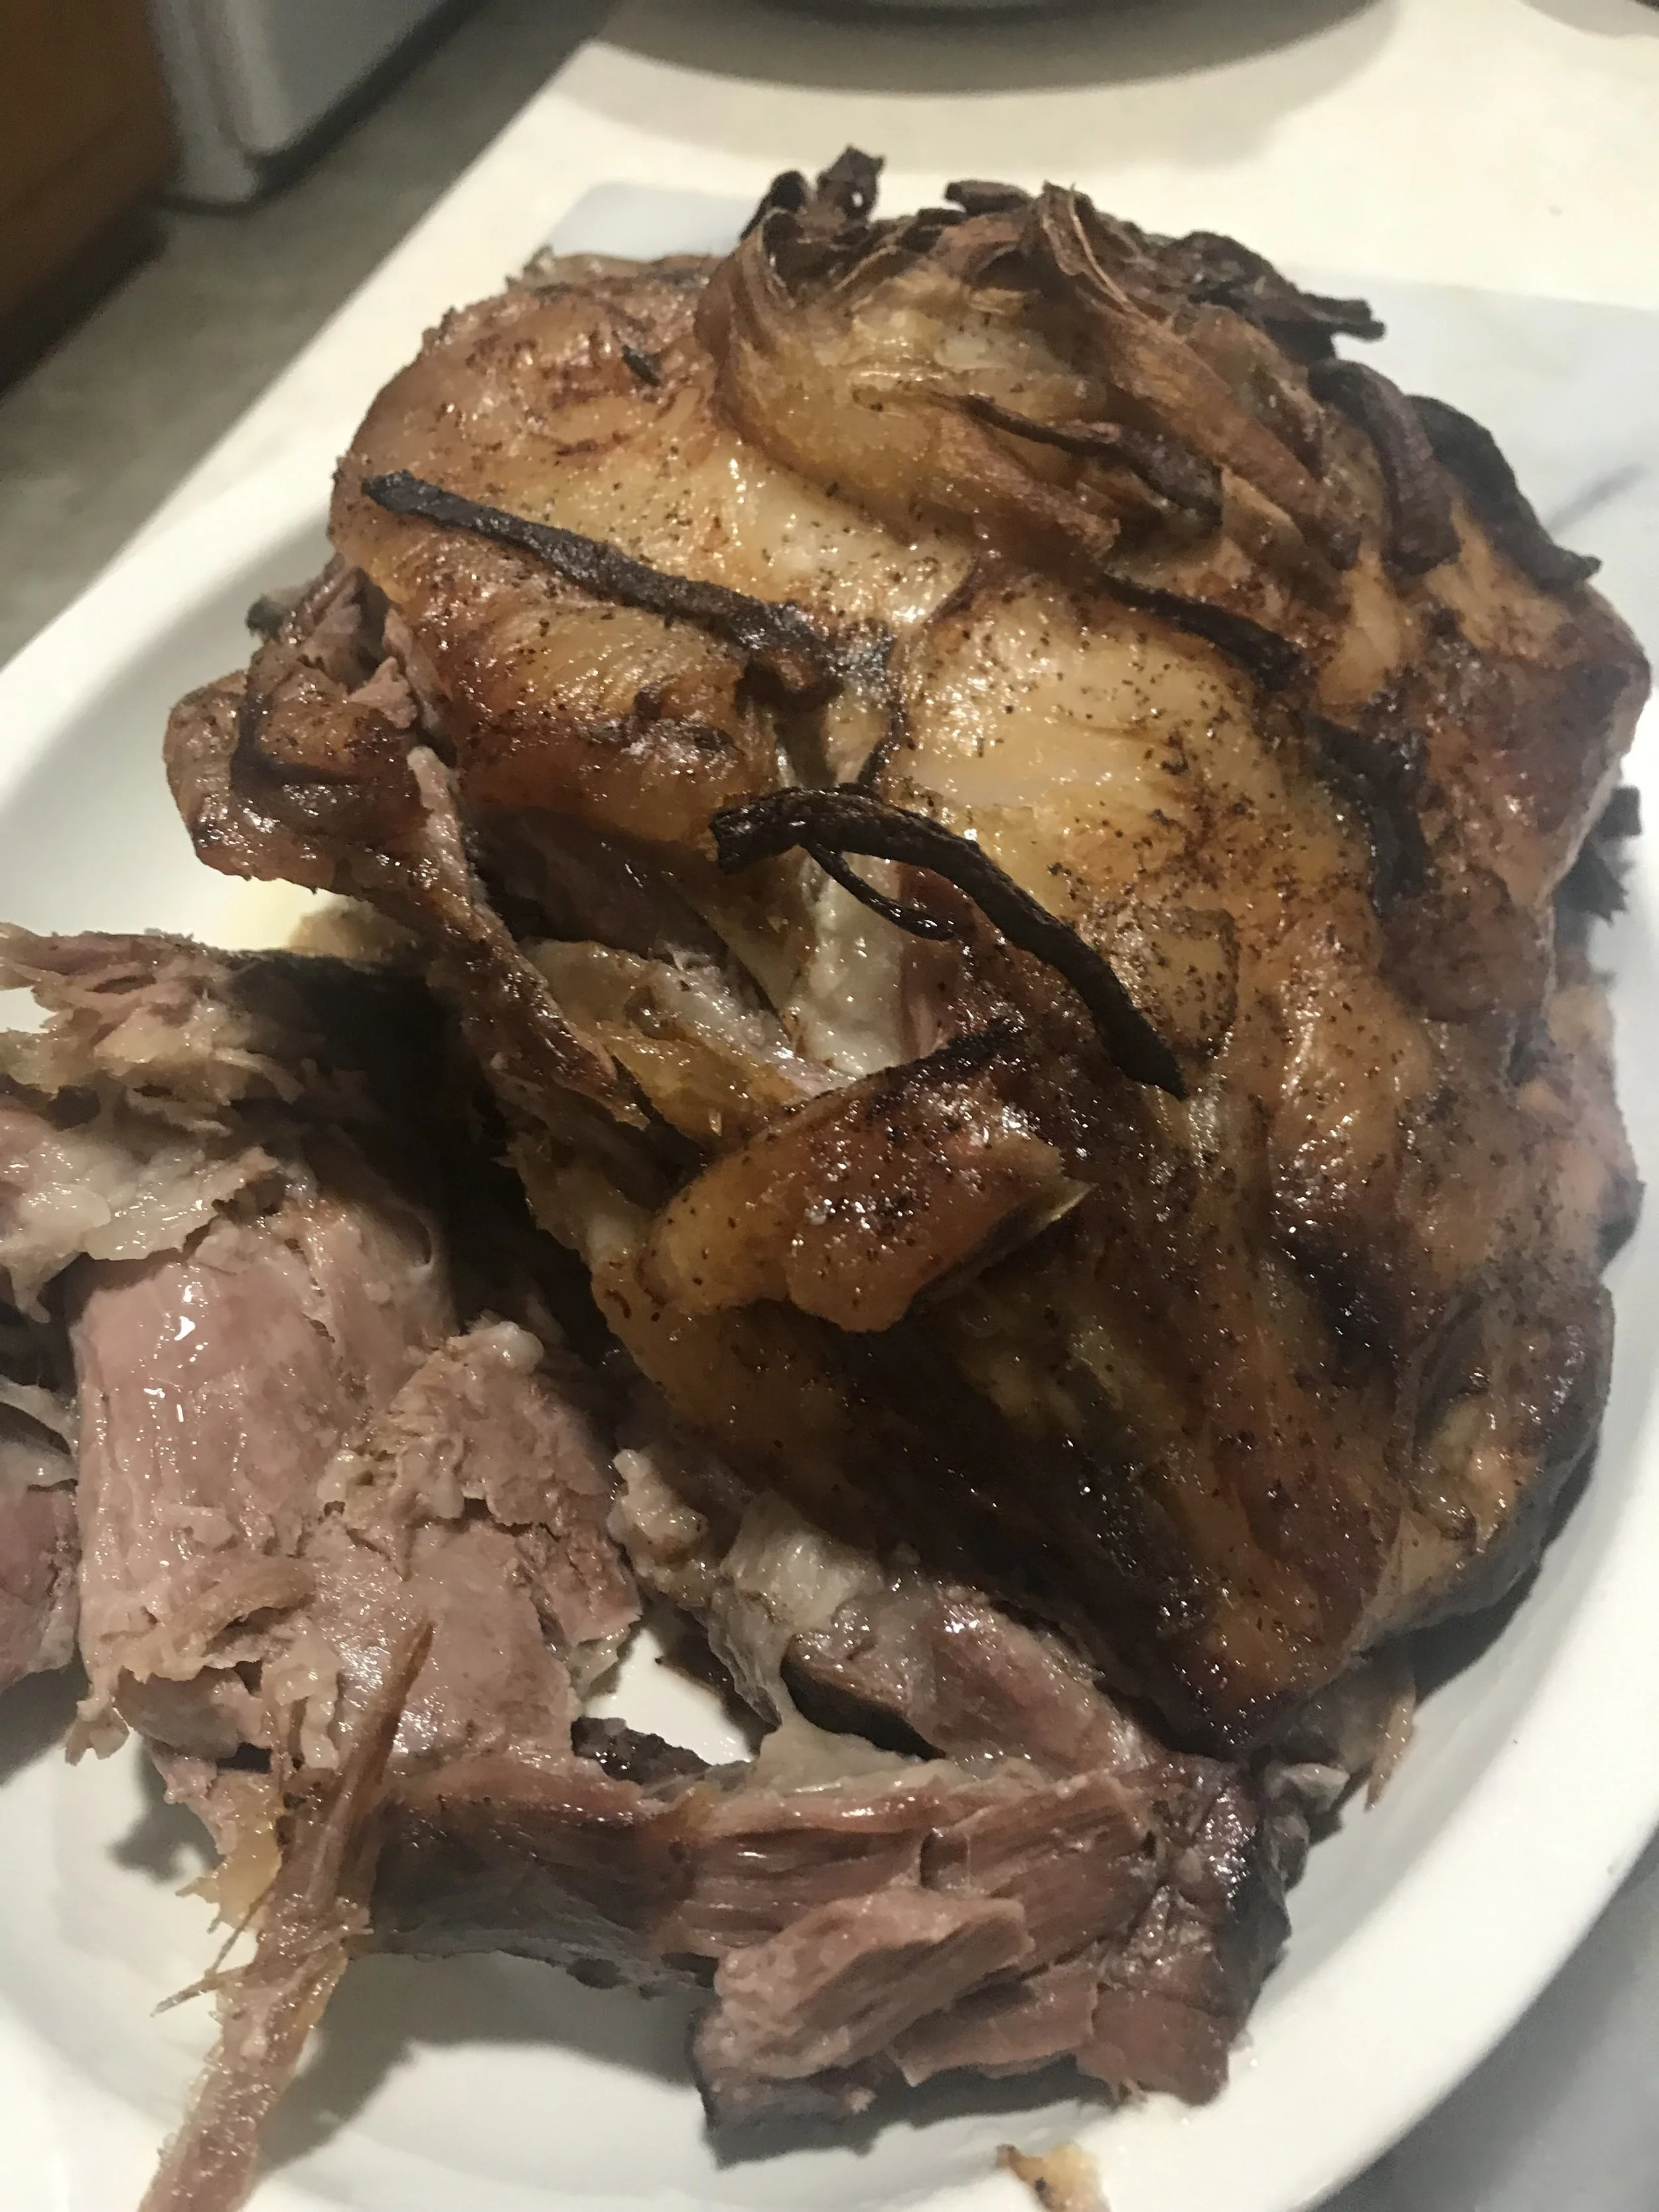
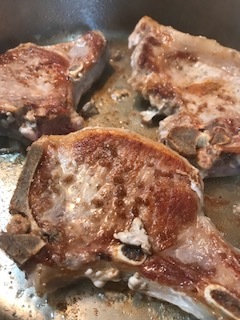
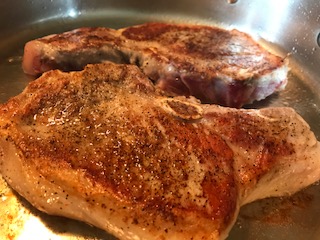
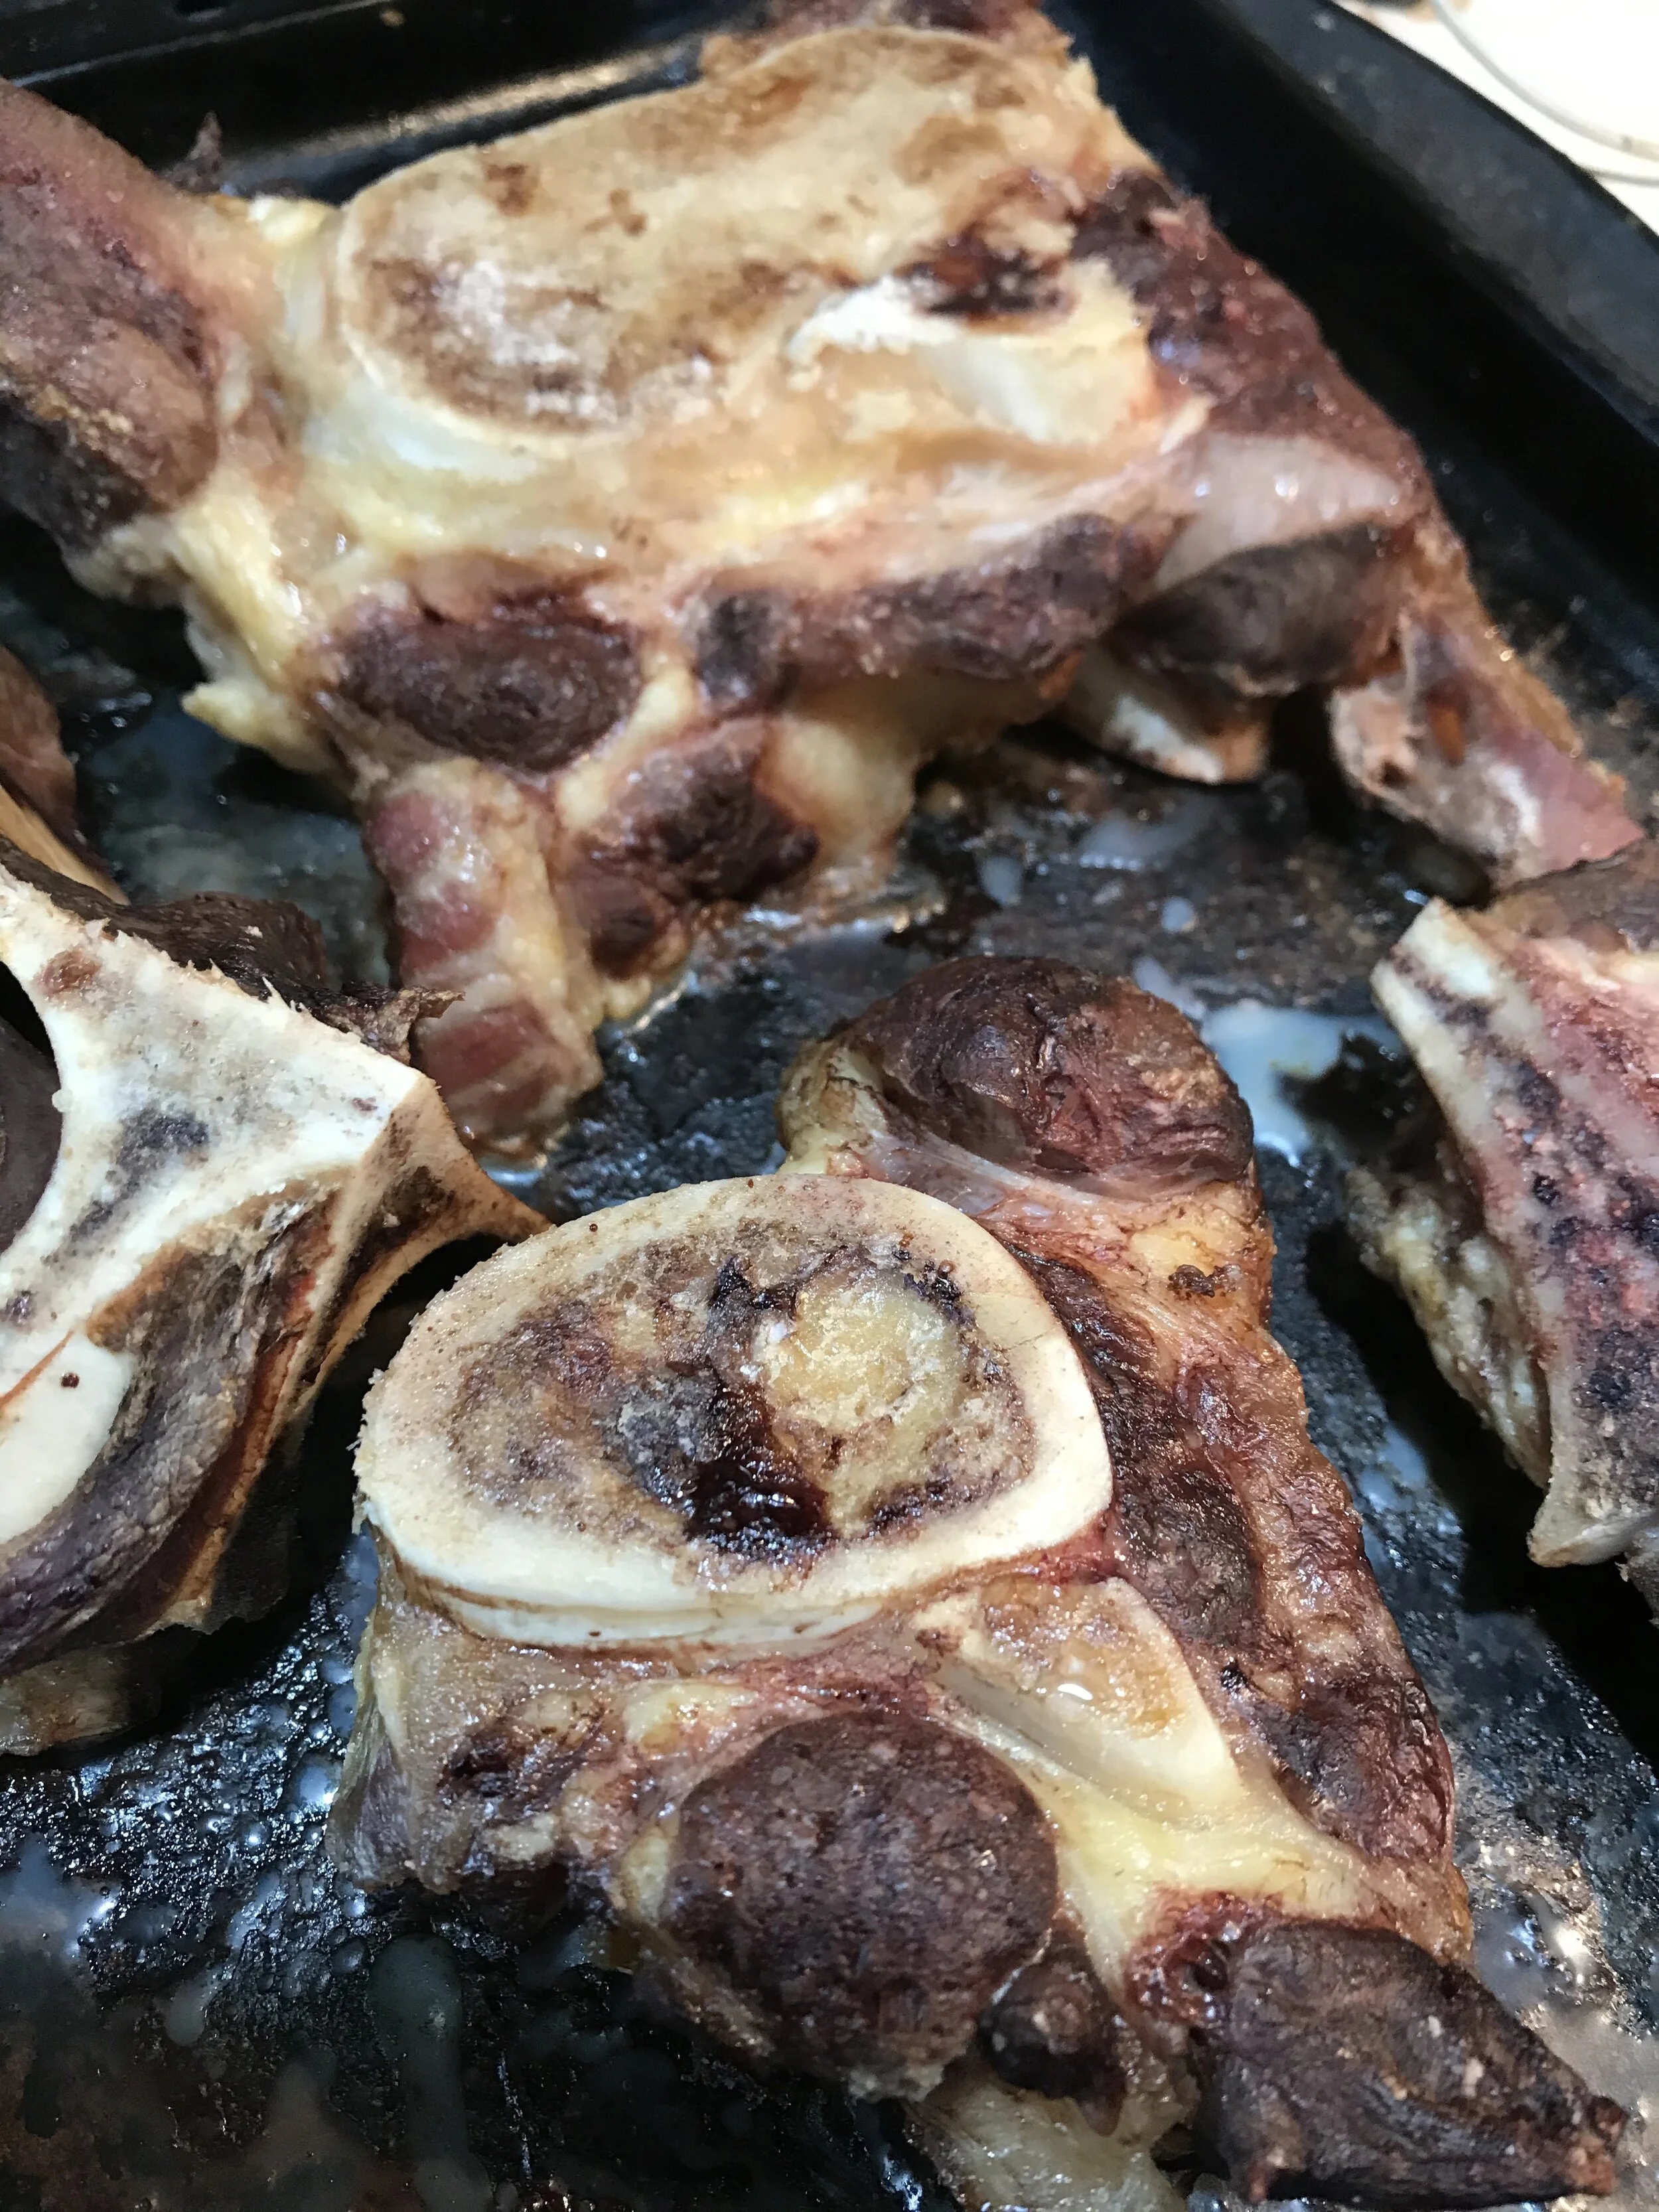
I do like using the beef marrow bones but I also save all the beef steak bones, pork chops bones, pork spare rib bones, and pork neck bones. Each batch I make is different and unique.

I often will roast the bones if they are raw. Just put them on baking sheet that has a rim- I call them cookie trays. The bones will produce some liquid so a flat sheet will make a mess…….

I roast at 350-375 about 30-45 minutes until they get a dark brown color. That color is creating more flavor. Of course you can skip it if you want a milder liquid or the bones were already cooked like from steak…. Do what makes you happy.

Then they go in the instant pot, with 3-4 carrots, 2 or so stalks of celery, 1 medium-large onion and whatever else I want to toss in. Apple and peach peels add something a little different. I’ve added in wilting lettuce, limp kale, blah swiss chard, spinach, tomatoes. The more diverse ingredients the more depth of flavor. I freeze a lot of parsley so a small handful often finds its way into the pot too.

I then fill the pot to just below the full line, and set it for 90 minutes. I use the soup button and the + button to adjust the minutes. But that’s my model, yours might be different.

I let it do it’s stuff then just let the pressure release on it’s own. After it’s all done, I release any leftover pressure and let it cool a bit. Then remove the pot, pour into a large collander inside a large pot.

Once that’s done I will restrain through a finer mesh if I want anything else out of it. Usually once is enough as what’s left is small pieces of herbs. I refrigerate overnight, skim off the firmed up fat the next day then freeze in containers or use it up in a few days. I like to freeze in 1 cup amounts and in 1 quart amounts as that’s what we use the most. Ice cube trays work well for small amounts.

You can also simmer this liquid down so it’s more concentrated flavor and you can use or dilute a bit as needed for whatever dish. I do this sometimes when I think it’s kind of weak for whatever reason.

Seasoning to taste. Did you notice I didn’t add salt or any herbs? Of course use any herbs you like. I do like thyme, oregano, parsley and will add them sometimes. I usually don’t add salt until I use it in cooking.

It’s up to you how you season it. Mine are never quite the same and well my cooking isn’t the same every time either.

So save those bones or stop in and get some more and make some stock or broth.

NEVER EVER GIVE THE COOKED BONES to your pets. Once they’ve been cooked in anyway they become brittle and dangerous. Once they have been under pressure in the pot they are even more brittle. They go in the garbage (or really deep pet proof compost pile).

BEING HONEST: Yes i’ve purchased it at the store before, no shame in it. I’m working hard to put a homecooked from the farm, meal on the table and sometimes it’s just too much to do everything. My supply was out in the freezer and I didn’t get to making more. So sure convenience wins out sometimes. I just try to find that balance because I can so easily overload myself, stress out and feel like a failure. Now I just do what I can and enjoy the life I have.

So make some stock, freeze it for later or use it up this week. It makes a pretty different and filling breakfast on the go too………. Then relax.

What is Grassfed and why carefully managed grazing takes carbon out of the air.

Not all Grassfed is the same. We all do things differently but here are some points that we practice.

It’s not the cow that causes problems it’s the management of the human farmers that makes or breaks their hoof impact.

For us grass fed means that our herd is grazing on grasses, weeds, legumes all the warm season in this part of the country. We mange how the cows graze, how they impact the land and always with the future in mind.

We don’t feed them grain or fermented feeds or grain waste from the plentiful small breweries. They graze from about the end of April to mid November. Depending on the year it can be more than that but that’s an average. It all depends on mother nature.. Too cold or wet of a spring and the pasture could not be growing well or could just be too wet where hooves could damage the plants themselves. Same thing in the fall. Lately the cows are moving to the barn yard to be fed hay around Thanksgiving time. It’s usually cold and wet then, the ground isn’t frozen and those hooves can easily damage the plants.

We don’t want to damage the plants or the root structure because doing that now is bad news for grazing in the next couple of years. It’s true.

Our cows are moved around the pastures often. Often moved to fresh ground 2x a day depending on where they are. Currently they are finishing grazing our hillside and we are getting another round of hay done plus have a big event on Saturday. So the cows were given a larger area than usual with some brush and trees that will keep them busy until we move the to the main pastures Friday before our event.

THEN they begin the usual 2 times a day moving, those areas they graze then rest for 30-60 days before they are grazed or hay taken off. we make 90% of our own hay for our beef herd. We do buy in some for our pigs to munch on at the moment but that’s 15-20 round bales a year. Yes pigs like hay too.

Key thing we do is to always have plenty of grass for the cows all the grazing months and this take some planning, lots and lots of planning and lots of previous data how the land is performing.

If you hear a farmer who grazes cows say that their pastures aren’t performing you can bet we are shaking our heads knowing that farm has a lack of holistic grazing knowledge. They’ve fallen into the trap of most humans that think they control how things grow. Sure we can to a point but it’s fine line between managing how we and our animals and our machinery impact the land and just plain old “it will grow this way or I will just plow it, spray it, fertilize and and replant it so it does what I want it to do.

We observe, make changes to where the animals go, how long they are there, what they ate and how they ate then make changes based on that observation and our goals. Our goal is lots of grass for a long time.

So what is Grassfed? Simply no grain of any sort ever, well that’s how we see it.

When a farmer makes a claim of grassfed, go for a tour, ask them how they manage things, and do they feed hay in the summer. If they do then why aren’t they grazing grass instead of feeding hay.

Often they have too many animals for the amount of land they have. A very very basic number is 1 acre per adult animal in a well managed grazing system. Now some have a better climate and probably have improved their land so they can do with less acreage but those are few and far between.

We usually have 2 acres per head- adult or young stock because half of that accounts for us making hay for winter feed off those same pastures. Some farmers don’t do that and buy in hay. It’s whatever works for them financially. If be bought hay it could cost us $15,000 or more to feed our herd but then we could graze more animals and have more meat to sell but then our cost of hay could double to $30,000 a year. Then hay could be of dubious quality and nutritional value.

We instead carefully graze a small herd and always are careful of how much the land can easily handle with out a negative impact.

The opposite is cows and other livestock in barns their entire lives. Where farmers are always working to feed those cows every meal using machinery run on fossil fuels, powering the lights and fans to control the barn climate for the animals, where disease and illness is more prevalent because of close quarters and closed environment making it necessary for more and more medications. Where manure from these concentrated feeding wharehouses are toxic and dangerous to YOU, ME, THE AIR and the WATER.

Farms like ours have a careful balance where the manure breaks down naturally to create more dirt and does'n’t cause environmental crisis. Farms like hours are also not polluting the air with the disgusting smell of liquid manure so many communities are plagued by.

Make a choice and make a difference.

Every time one of our cows munches on grass, that grass then grows through photosynthesis and then it gets even better…… it pulls carbon out of the air and back into the ground. That’s call carbon sequestering and that’s why it’s the how the cows are grazed that can actually negate greenhouse gases.

So if you want to buy green credits and balance out how much your car or traveling by plane uses up fossil fuels, you can pay us to graze cows. Better yet, just buy meats and veggies from us and invest in the farm growth so we can feed more families safely.

OPEN FARM DAY MADISON COUNTY

EVERY YEAR Madison County has OPEN FARM DAY.

This year 38 farms are participating. IT’s free to visit any farm who is participating.

We have passports at our Farmstand, and they are often found at local businesses. Some of you might have gotten one in the mail.

You can also check out :
https://openfarmdaymadisoncounty.com for the online version.

At Creekside Meadows we have:

self guided walking tours around the farm. We have moved our beef herd and some of the pigs closer to our barn so it’s really easy to see them up close. It’s 150 acre farm and we know most of you really don’t want to hike it all and our animals are usually in different further parts of the farm. So we make it easier.

cmfopenfarm.jpg

Us 3 farmers will be on hand too.

PLUS, we will have some antique and old machinery plus more current equipment on display.

Sugar Shack is open so you can see what we do in the spring. Blacksmith shop is open and you might get lucky and Cam will be doing some demonstrations.

Our farmstore will be open so you can shop from our big freezers for our grassfed beef and pasture raised pork plus maple syrup and farmstead soaps AND woodworking items. We have some special sales and Meat packs for this day only so bring a cooler! We also take credit cards!

LIVE MUSIC by Johnny Shoes.

PLUS PLUS PLUS

Our circa 1905 Detroit Engine Works SANDOW stationary engine will be running (we hope!) the 1905-1910 Ireland Iron Works Drag Saw (made in Norwich). Both are extremely rare- we haven’t found others and only out for 1 day a year- for OPEN FARM DAY. This is the coolest engine that has 3 moving parts and runs on kerosene, gasoline, alcohol and even… moonshine.

The drag saw was used to cut logs for firewood length instead of a 2 person saw and way before chainsaws. We’ll cut wood slices and they are for sale too.

We are NOT serving lunch but bring your own for a picnic here or try one of the many other farms offering it.

This is our only OPEN TO THE PUBLIC farm event this year so come see us

SATURDAY JULY 27th 10 am til 4pm

(not open Sunday but our farmstand is open self serve)

Our booth at the Cazenovia Farmers Market will also be open with LOTS OF MEATS TOO! 9 am til 2pm

fullsizeoutput_bd5.jpeg
XisYYUmxRZiXXRMHKeZQ3Q.jpg

Copy of Apple Maple Roasted Ham

 Bringing this back for 2019 with updates. Enjoy.

The best way to have  the perfect ham is to start with high quality Pasture Raised Pork.   We’ve been raising our pork at our farm for over 15 years now and how it is raised makes a world of difference for a delicious meal.  

I know you are might find a Ham a bit daunting to roast but it's really just a few steps to perfection.

How to Roast thePerfect Ham.png


First you need a ham.    Creekside Meadows Farm Pasture Raised Hams are smoked and flash frozen because they aren’t held in a saline solution like store hams.  It can take 2-4 days to thaw in your refrigerator depending on the size so plan ahead. 

Quick Thaw:   If you are running late you can still make it happen the day before as follows: You need a large pot or container to hold the entire ham still in the plastic wrapping fill the container with cold water and replace the water every 30 minutes with more cold water.  Thawing will take 5-6 hours and maybe longer for a larger ham.  Then just refrigerate until ready for roasting.

Preheat the oven to 325F.  

Skin off:  Trim all the skin off the ham and trim fat to about 1/4 to 1/2 thick.

 Skin on:  If your ham doesn't have much of a fat layer or is very thin, leaving the skin might be a better choice.  You will need to score all the skin in a crisscross patter deep to the meat.  You want a lot of the crisscross so later on the glaze can penetrate.

Place ham in a roasting pan preferably on a rack so it doesn't stick to the pan.  If you plan to glaze it line the pan with foil for easier clean up.  Add about ½ cup of f water to the pan depending on the pan size, a larger roasting pan could use 1 cup of water.  Roast at 325F until internal temperature reaches a minimum of 130F.   This can take 15 minutes per pound.   Add more water to the pan if it evaporates.

Once the ham is the proper temperature which on a larger ham may take  a little extra time, remove ham from the oven.  Increase oven temperature to 425F.   Prepare the glaze.

APPLE MAPLE GLAZE  (or try the tangy orange one at the bottom)

2 cups apple cider 

     heat in a saucepan on medium high, stirring often until reduced to 1/2 cup

add 1/2 cup apple jelly 

1/2 cup maple syrup

1/4 teaspoon ground nutmeg

1/2 teaspoon ground allspice

1/4 cup whole grain brown mustard

   Stir well and simmer until warmed thoroughly

Once ham has reached 130F internal temperature.   Increase the oven to 425 and spread the glaze generously over the entire ham.   Roast for 20 minutes and baste a few times during that time with the pan juices.  

Remove from oven, place on a platter and let it rest about 15-20 minutes before slicing and serving.  Drizzle a little of the remaining pan juices over ham before serving.

UPDATE IN 2019

This winter I’ve cooked up a few hams in my slow cooker and played with other ingredients.

it takes about 6 or so hours on low in my slow cooker for a 5 pound boneless ham. Every slow cooker is different so be prepared for times a little different.

1 thawed smoked boneless ham from a good local farmer

1-2 cups cup apple cider (not juice)

1/2 cup maple syrup

Optional: a couple big spoon fulls of orange marmalade.

do you need cider and maple? Nope, but we like the flavors. You could instead just add some water instead. Hams like ours have tons of flavor so anything you add can be subtle to enhance that built in flavor.

That’s it. SLow cook on low for 6 -8 hours.

Remove ham, let rest a bit, remove the tie or net, and slice.

The remaining juices can be poured over the ham or reduce it down by simmering until it’s thicker works nice too.

I find that I will cook the ham the day before and slice it the next day then rewarm with the juices just before a big family meal.

Disclosure: I can get stressed and forget things like plugging in the slow cooker, or setting it on warm not low…….. so I try to do somethings ahead of time. Then who cares if my old oven dies the day of the meal (that happened one year….).


TANGY ORANGE GLAZE

6 cloves garlic, peeled, smashed well and finely diced

8 ounces orange marmalade

1/2 cup dijon mustard

1 cup light brown sugar (or maple sugar or turbinado or sucanat)

1 orange zested

1 /4 cup fresh orange juice.

Heat all ingredients in pan on medium until mixed well.    When ham has reached 130F, increase oven temp to 425F, glaze the ham all over.   Roast another 20 minutes and baste with any extra pan juices a few times.  

This glaze works well in the slow cooker too but add about a cup of water then pour glaze over top of ham so it can soak in while it cooks.


Happenings March 2019

It’s finally March and spring is on the way. The sun was out Friday and Saturday so we tapped our Maple trees on the hillside. I think it’s 175 taps which is not huge compared to many but is respectable and will keep us very busy making maple syrup.

As we collect enough we’ll be boiling. We’ll post videos on social media and let everyone know via email or social media when they can swing by to observe and get a taste of the liquid gold.

We had piglets born to Momma Red a few weeks ago. There are 11 little bundles of muscle and energy having fun in the snow and ripping up hay bales. We now only have piglets 2x a year and have 2 sows. We used to have 4 litters from 2 sows and briefly had 3 sows with a total of 6 litters. We’ve found our sweet spot so to speak where we produce the right amount of pork for our customers balanced with our farm life and also what this land can environmentally handle safely. Pigs are really hard on land so we have to be careful how we manage them and their impact. Plus pigs consume a lot of grain and we prefer to concentrate on grass eating cows and chemical free vegetables. Those both use low inputs from outside the farm and work the best for our farm business and the land. Plus keep in mind it’s only 2 of us here full time and 1 off the farm weekdays- we do not have employees or low paid interns. We keep it simple and in that “sweet spot”.

oh wow, the post office just delivered the first of the seed orders from Johnny’s seeds. I ordered on Thursday and here they are on Saturday. I love that fast turn around.

Probably next weekend I’ll start seeding in the greenhouse right now I’m starting some peppers inside as they can be finicky and like more heat.

I’ve got some good plans for the summer gardens. More concentration on good lettuce, and salad fixings. I’m not doing much of those crazy veggies many have no idea what to do with.

I will have a kale, spinach, swiss chard mix for early spring salads and cooked greens, then move on to summer lettuces, radishes, zucchini then of course tomatoes and sweet corn.

I’m being careful of too many tomatoes so doing many different colors of cherry and grape tomatoes as farmstand customers love those the most. A few good sized slicers for sandwiches- red and ORANGE because color is good.

I going to try like crazy to have early carrots and carrots all summer. Last year I had some problems and no carrots until August. I’m on top of it this year (I hope).

We had awesome sweet corn last year but lost late plantings to ear worms. We could spray chemicals an we could get some genetically modified seed but those go completely against our beliefs. Most sweet corn in our area is sprayed with something either for weed control or insects. Some have the treatment built into the genetics of the seed. We don’t like it and we hear from our customers all the time how ours taste the best. So, Instead we will be trying a few new things- one of them is an organic treatment that is labor intensive. It involves applying mineral oil drops to every ear of corn at an early stage. I’m still researching and determined to come out ahead of those gross worms. Lots of reading and asking questions from me. Many organic farmers told me they just don’t raise it anymore or just raise 1 or 2 plantings for August and stop. I think we can win or at least come out ahead.

I’m off now I have some long awaited and long time saved for new appliances coming to the farm kitchen and need to get things moved around for that. I haven’t had a new stove or dishwasher in almost 20 years and what we have came with the house. They both are giving up so time to upgrade so my life is a little easier.

See you soon.

Tricia

Make Corned Beef

Corned beef is a super cheap of meat in the grocery store. It comes in those vacuum packs making you think it’s “fresh”. It’s in that brine solution for months which has me wondering how tough is that cut of meat that it needs to brined that long AND THEN boiled for hours.

You can make your own and over the years I’ve tried a few different ones. Some use a ginger beer (non alcoholic like root beer), some use a beer, some have sodium nitrate (pink salt) some koshers salt. All use salt as that’s just how it’s done.

Here’s my latest recipe that I like and comes from the Compete Meat Cookbook by Bruce Aidells and Denis Kelly.

8 cups of water

1 1/4 cups kosher salt

1 cup sugar

3 tablespoons pickling spices

1 6-8 pound brisket. Seriously I use a 1/2 a brisket around 2-3 pounds because I rarely have whole briskets left by March.

****

1 medium onion spiked with 3 cloves

3 garlic cloves

1 carrot coarsely chopped

1 celery rib coarsely chopped

3 bay leaves

1 teaspoons pepper corns

Bring water to boil, add salt and sugar, stir until dissolved. Add the pickling spices and let cool until room temperatures, the refrigerate until cool to 45F

Pour brine into large bowl or container (not metal), or large ziploc bag. submerge the meat. Putting a plate on the meat will help it stay under the water. Refrigerate 8- 12 days. Stir or shake every day and turn the beef.

When ready to cook, remove from brine, to large pot, cover with water and add the onion, cloves, garlic, celery, carrot, bay and pepper. Simmer on low 2-3 hours and until tender. Thinly slice against grain, serve hot or cold.

Note that because this recipe doesn’t use sodium nitrate the meat won’t be the nice pink color inside much.

Making Stock

I’m big on making our own meat stock since we have so many bones from our livestock.

I also appreciate that it’s a nice drink in the morning or even lunch, fills me up and it just makes me feel good. It’s a key ingredient in so many meals here at the farm in the winter and even in the summer.

I don’t measure much and anything goes. It always turns out delicious and since I started doing this my joints feel so much better. I’m told it’s the gelatin and minerals from the bones.

How to do make meat stock. I make a beef pork mix and also a chicken stock.

The mix stock I use for stews, beef soup and cottage pie. The chicken one I use for squash soup, when cooking up wild rice, chicken pot pie, chicken soup, mashed potatoes and just to sip on a bad day.

What’s stock vs. Broth? I think of broth as made with just bones and a little lacking in over all flavor. Stock is heartier, includes vegetable and way more flavor. Most of the time I want the extra flavor so I make stock.

HDDyos8sSiqL4KSewVK5Yg.jpg
  1. Save bones from all meats. Preferably from Grassfed and Pasture Raised meats but do what you can. Bones from roasts, steaks, chops, marrow bones, chicken carcass (feet to if you can get some).

  2. If they aren’t already cooked I will roast them in the oven until they smell wonderful and have a nice browned color. You can sprinkle with salt and pepper if you like.

  3. The veggies. Okay sure you can make a broth with just bones and I find it a little blah for me. So I add in onions- skin and all, celery, carrots, parsley. If I have some leftover green beans, a soft apple, peach peel… leeks. I’ll toss them in also. How much? keep reading.

Instant Pot is the fastest way to make stock (or broth). But slow cooker and stove top are just fine.

So many Instant Pot recipes call for stock or broth, why bother buying store bought with extra stuff you don’t want and iffy processes? Make your own.

I have the 8 quart version because I cook in larger volumes. 6 quart is just fine.

I put in a bunch of bones. The last batch I had 4 small beef marrow bones and a dozen pork chops bones. I roasted them in the oven at 350 for about an hour until they were a deep brown and smelled wonderful. Put those in the pot but not the grease leftover- I tossed that in the compost.

Then I added 3 stalks of celery chopped in 2 inch or so lengths, 3 carrots- not peeled and cut into about 1 inch long pieces. I also added 1/2 a large onion, coarsely chopped plus the skin. Then some parsley from the garden that I had frozen. About 1/2 a cup full- not needed. Then 1/2 tablespoon of coarse pepper and 1/2 tablespoon salt. You don’t have to add the pepper and salt- I did because I like how it comes out.

I also add in 1-2 teaspoons of dried thyme and oregano.- completely optional.

Vinegar- okay should you add some vinegar to this to help minerals to be drawn from the bones. I’ve done it that way and also read that it’s a myth. I do like the flavor of some balsamic vinegar about 1/4 cup when I do the beef/pork stock. I’ll use Apple Cider Vinegar with Chicken bones. But honestly, I forget sometimes and have not noticed. It’s up to you and do what makes you feel good!

All this goes in the instant pot, then covered with water, usually about 3-4 quarts of water. Be sure to not to over fill and follow the line on the pot.

If you don’t have as many bones, you can cut back on the veggies a little if you want. Adjust the amount of water as needed.

Use the Soup setting and reset it to 90 minutes. Once done I just let it naturally release. Take pot out of cooker and strain the solids. I then let it cool so I can skim off any fat. Freeze in ice cube trays and any containers you want. Or refrigerate and use within a week. I freeze in 1 cup amounts and 1 quart amounts then some in ice cube trays so it’s easy to have an assortment of amounts on hand for whatever dish I need it for.

I do the same veggies when I do chicken stock too. The chicken bones if from a cooked chicken just get put into the stock if I have a raw chicken carcass I will roast them like the other bones to develop the color and improve the flavor.

SLOW COOKER

Ingredients and water is the same, just cook on low for 8-10 hours.

STOVE TOP

Ingredients the same just bring to a boil then simmer all day.

I’ve been known to simmer things in a really big pot for 2 days and making a few gallons of stock at a time. Now that I have the Instant Pot I can start it in the morning and all cleaned up before lunch. Or do some after dinner and let it chill overnight. Easy and Delicious.

Other things to add: An apple or some peach peels, soft onions, wilted celery, those carrots that are getting soft so aren’t so great to eat fresh. Leftover veggies from the veggie drawer- lettuce, kale, green beans, a little fennel, basil, zucchini, winter squash- even the rind! … Somethings I did not care for was cauliflower and broccoli.

I’ve heard chef’s say the vegetables should be roasted to improve the flavor and color of the stock. So….. I don’t bother to do it. I did once and really didn’t notice a difference since the bones were roasted. I’m happy I’m making time for what I’m doing so I don’t stress about the perfect flavor. Probably why I’m not a chef!

**do you need to roast the bones? No you don’t. I’ve done it for years without roasting and things were fine. Chicken bones with out roasting or cooking before turn out pretty good. Beef and pork bones I find that the flavor is soooooo much better if I roast them quick first. Do what you can fit into your time. Making stock is a big step for our meals when it’s so easy to buy that sealed carton on the grocery store shelf.

Small steps people. Make some small changes. Buy better meat, use leftovers, save the bones for stock…… Your body will thank you and you are taking one more step to improve your food. Nice job.

vG11sYTZSYWHvqEWpWIsDg.jpg

Sweet Italian Sausage with Potato wedges and Rosemary

20161101_134941.jpg

What a delicious way to class up some simple sausage and taters

It’s simple and easy prep.

Do ahead tip:

Pre-cook pieces of sausage and have them in the freezer. It makes for really quick meals and so much better for you than any take out.

It’s easy to use leftovers too.

If you prefer really spicy sausage it would be great with Creekside Meadows Xtra Hot Italian or even our Mexican Style Chorizo.

Recipe serves about 6 people but it’s easy to halve or double it for a crowd.

From Farmer and Cookbook Author Shannon Hayes. The Grassfed Gourmet- if you don’t have her books seriously you should!

2 pounds Creekside Meadows Sweet Italian Sausage- Cut into 8 pieces

1/4 cup coarsely chopped onions

8 medium sized russet potatoes, cut into large wedges

1 teaspoon salt

1/4 teaspoon pepper

1/2 teaspoon cayenne pepper- don’t skip it as it really adds to the taste

1 cup dry white wine (see tips below if you prefer not using wine)

4 springs of fresh rosemary

Preheat oven to 350F

Heat 2 tablespoons lard or olive oil over medium heat in a large oven proof pot or cast iron skillet or dutch oven.

Brown the sausages 3-5 minutes each side- you aren’t cooking them through just browning them. Remove and cut into pieces about the same size as the potato wedges- I cut my pieces into 2-3 pieces. . Pour off the fat, add another 2 tablespoons of lard or olive oil, add the onions and saute until transparent. Add in the potato wedges and cook about 5 minutes on high heat. Stir often so they don’t stick.

Return sausage and their juices to the pot, add in the salt, pepper, cayenne. Pour the wine over the top, add the rosemary. Cover and bake about 1 hour until the potatoes are pierced easily with a fork.

I served these with some steamed carrots and fresh applesauce.

The dish calls for 1 cup of dry white wine and I know someone won’t like this. Remember the alcohol cooks off and leaves that wonderful flavor behind. I would assume apple cider or chicken broth could be used but of course imparts a different flavor. I have not tried either but let me know if you do try a non-wine liquid so I can share the results!

If you happen to have leftovers….

I cut everything into smaller pieces then add to a frittata or just reheat on the stove top. I warm up a small cast iron pan, add in some olive oil, lard or butter, then saute everything until warmed.

20161101_135009.jpg

Sweet and Tangy Meatballs

The perfect snack or appetizer that will be gobbled up. I made these a few years ago for samples at an event and they were so popular. Easy to make ahead of time, freeze and toss together for gatherings or hungry peeps after a long outdoor day. I like making these ahead, cooking in the oven, and freezing for later times.

makes 48 little meat balls and is easy to double.

1 pound Creekside Meadows Grass Fed Ground beef

1 pound Creekside Meadows Ground Pork

1 cup bread crumbs

2/3 cup finely minced onions

1/2 cup milk

2 eggs

2 teaspoons worcestershire sauce

salt and Pepper

1/3 or more olive oil or lard (for pan cooking meatballs)

10 ounces grape jelly

12 ounces chilli sauce

In large bowl mix together beef, pork, breadcrumbs, onion, milk, egg, worcestershire sauce, 1 teaspoon salt and 1/2 teaspoon pepper. Shape into 1 inch balls. It should make 48 balls.

IMG_2039.JPG

You can then pay fray then in the oil, in batches on medium until browned on all sides and cooked through. Add more oil as needed.

I prefer oven cooking them as it’s much less work to do, and less mess. I lay them in a rimmed baking sheet, you can line it with aluminum foil for easy clean up if you’d like. I don’t as it’s just overall less waste. Roast at 400F for about 20 minutes. Internal temp should be 150-155. Remove from pan onto paper towels to drain.

In large sauce pan mix the jelly and chili sauce, bring to boil briefly then add in meatballs. Lower heat and stir gently to coat meatballs. Once they are heated through serve on a platter with toothpicks or I like to put them in a small crockpot or electric fry pan to be kept warm and your guests can serve themselves.

Watch them disappear fast.

IMG_2049.JPG

Pork Shoulder Slow Roast with Onions and Apples

See how juicy this is? Perfect, fall apart tender and a very flavorful sweet meat. Enjoy.

See how juicy this is? Perfect, fall apart tender and a very flavorful sweet meat. Enjoy.

Pork Shoulder isn’t just for pulled pork or cooking in the smoker. It really lends itself to a slow oven roast (or slow cooker) on a bed of onions and apples.

I’ve adapted this from Long Way on a Little by Farmer Shannon Hayes (Sap Bush Hollow Farm, NY).

Growing up my parents didn’t really know how to properly cook with onions. As I’ve worked on improving my cooking skills I discovered that onions needs some love and some heat to really be enjoyed. Some heat to soften them up and bring out the sweetness.

Pork goes with apples and onions pretty much all the time. Heck even pigs like apples although they don’t care for onions. Anyways….. back to the recipe.

As you can see this roast is BIG- it’s a 5 1/2 pound bone in Pork Butt Roast. Butt does NOT refer to the buttocks of the pig it’s actually part of the shoulder. I will not get into the reasoning for this odd and totally confusing name, at least not now I’m hungry.

You can certainly do a smaller roast if you have to.

This was roasted in the oven but a slow cooker would work. I have NOT done this particular recipe in the InstaPot, if you do I would suggest you caramelize the onions first using the saute feature. I slow roasted in the oven so skipped that step.

QoxKfj+AQLOwwY3JERAGKA.jpg

Recipe

1 Pork Butt Roast- it comes from the shoulder and you could use a shoulder roast too.

3-4 pounds.

2 pounds onions, peeled and sliced thin

5-6 baking apples (go for tart if you can, if not wing it with what you have) Scrubbed but not peeled and quartered

Some salt and Pepper.

Place roast on a bed of onions and apples in your roasting pan. Sprinkle with a tablespoon or so of coarse salt and a couple teaspoons or so of black pepper. See? Simple.

Roast at 250-300F (not all ovens will work well at 250F- mine won’t but it needs replacing)

6—7 Until fall apart tender. Smaller roasts will only take 3-4 hours.

Instant pot- yes!

You need liquid for the instant pot. I used 1 cup chicken broth and 1 cup apple cider.

Use the Saute setting, once hot, add a few tablespoons of olive oil or lard, add the onions stir to prevent sticking and burning. Once they are nice golden brown, remove, then sear the roast on all sides, adding more olive oil or lard as needed. Remove. Turn off, add 1/2 cup of chicken stock to deglaze the pan, scraping to loosen up all the browned bits. Add in remainder of chicken stock and cider, apples, onions. Use the meat setting and set it to 90 minutes for a 4 pound roast.

**the instant pot directions say 15 minutes per pound and I find that with really good pasture raised pork it’s more like 20 minutes per pound.**

once it beeps as done, let it naturally release the pressure. This can take about 15-20 minutes and is important for a tender fall apart roast. Check to see if the roast is tender. If not it needs another 5-10 minutes of press. Remove roast to a platter, tent to keep warm. Press Saute button and reduce the liquid down to what you would like. Stir often. Slice roast- or pull apart as it will be very tender. Pour the sauce, apples and onions over meat at serving.

Leftovers make excellent warm sandwiches, added to soups, stirfry, added to a green salad. I reheat with some liquid in a covered casserole in the oven at 300F. Sorry I don’t have a microwave!

TvsI86lyRRCwsSJGwsDM1Q.jpg

Cranberry Orange Pork Loin Roast

It’s the season for roasts if you couldn’t tell from the posts lately.

Pork Loin Roasts are so under appreciated and yes often overcooked.

This latest recipe came off of Pinterest and there are similar versions.

This one uses dried cranberries, orange marmalade and balsamic vinegar and it’s really really really good. I will be making this one again.

The original recipe uses the slow cooker. I’m including directions for that and for an oven roast. I have not done in the INstapot but will be soon and let you know.

RECIPE

1 Pork Loin Roast- Boneless

**Our roasts are usually netted. I recommend you remove it and tie the roast with some cotton butcher string to make it easier to slice at the end.

1/2 cup dried cranberries

1/3 cup balsamic vinegar

3/4 cup orange marmalade

1/4 cup brown sugar (can also use turbinado or maple sugar) I think honey could be used too.

1/4 cup chicken broth or white wine (optional)

edited.jpg

Liberally salt and pepper the roast all over, about 1 teaspoon salt and 1/2 teaspoon pepper. Let sit for about 15-20 minutes. Heat up a heavy fry pan, add 1 tablespoon lard, tallow or olive oil. Once it’s shimmering start browning the roast on all sides. Once nice and brown all over remove to a roasting pan. I can’t leave all those browned bits in the pan so I took a little chicken broth and deglazed the pan, then poured that over the roast. You do NOT have to do that step but it’s a good taste enhancer.

Mix the berries, sugar, marmalade and balsamic vinegar together in a bowl, then slather it all over the top of the roast.

eoo2jBRvQDipOvPWyYSQ4Q.jpg

Roast at 325 for 1- 1 1/2 hours. I’m estimating about 20-30 minutes per pound. You want an internal temperature of 145F but no higher than 155F. Really I went for 150F and it was perfect. Remove from oven, pour off the juices into a small pan and let rest for 15 minutes- the temperature will rise a bit. Remember higher temperatures will overcook the pork and it will then be TOUGH and RUINED.

Heat up the sauce pan of juices and reduce down a few minutes or thicken with a little cornstarch. It takes like 5-10 minutes at medium to low heat to reduce it down to more of a thin syrup perfect to drizzle over meat slices. It really depends on how you want it.

To slice: If the roast is netted you will need to scrape off the berries, then cut off the net before slicing. Not difficult that’s why tying the roast is often easier!

Slice the roast, placing some of the cooked berries on top and drizzle with the sauce.

SLOW COOKER

Instead of oven roasting cook on low for about 4 hours until the desired doneness. But check after 3 hours as some cookers are faster and some are slower. I have 4 and they are all different. Why I have that many is another story!

IS9V8dvIRKCrObMnWNaG+g.jpg

All winter of 2018/19 you can find us at the Cazenovia NY Winter Farmers Market once a month or check our website for more details. We hope you’ll join our email list to get more updates as they happen because we know you want to know how your food is raised and how your farmers are doing.

Oven Fries

IMG_5827.JPG

I love French Fries and have for way too many decades. I remember my Dad getting a Fryer when I was a teenager, I think it was a “Little Frier” or something like that. It heated up oil and came with a fry basket. It was FRY HEAVEN! Sadly nobody figured out that cooking vegetable oil at high temperatures is pretty scary for our health well most fried things are. They- my parents- never would have cooked with pork lard or tallow, heck I never knew what it was until 20 some years ago and we butchered our first cow.

I still adore fries but now we make oven fries although from time to time I will heat up some beef tallow and do some really fries when in the mood.

I use Russet potatoes because they are perfect for so many reasons mostly because we grow them by the bushel full.

I never ever peel them because well we grow them and use no chemicals ever.

Scrub them up, cut them into fry sizes that make you happy. Toss them with some olive oil, some dashes of paprika, salt, pepper and then of course PARMESAN CHEESE because well you should have more dairy right? Sorry I have NEVER measured these things so go with your gut.

Cover some cookie trays with parchment paper then lay out those fries. Roast at 425 until perfectly golden brown and tender inside, crisp outside. Sure you can flip them half way if you must. How long to roast you ask? 15-20 minutes is the usual.

THEN because some days we want something extra special and a little decadent we then sprinkle on some shredded colby jack cheese and some crumbled up PASTURE RAISED CREEKSIDE MEADOWS FARM B A C O N ! Broil until cheese is bubbling.

It’s really a meal in itself. Cam likes them with Ranch Dressing (of course) but sour cream is yummy too. I’ve been known to add some cayenne pepper to either one for extra zip on a cold winter day.

London Broil- Crockpot Amazing- hey it's not just for the grill!

We sell lots of London broils during the summer since most people know how to grill them plus easy to feed a crowd. Now in winter London Broils sadly just hang out in the freezer sadly under appreciated. It causes me angst knowing so few people appreciate this delicious lean hunk of deliciousness. So here is one way I prepare London Broil.

Call it a pot roast if you want to, since it’s in a pot and it’s a roast!!! Sorry farmer humor after being out in snow all morning.

IMG_5723.JPG

Look at that beautiful piece of meat and the subtle marbling from all Grassfed Hearth Healthy Beef!

This recipe I used a small 2 pound roast that I as usual didn’t remember to thaw out the day before. I did put it in a pot of cold water to jump start things a bit a few hours before getting this going.

I used some sad forgotten in the snow green onions, fresh out of the mud (washed well ) carrots, celery that got smashed by snow in the garden and garlic of course. Of course you can add in some potatoes too but I was going to do some mashed potatoes separately. Toss them in and added 1/2 cup water and 1/2 cup beef stock and set my slow cooker on low. 8 hours later it was fall apart tender and perfect.

Now I know you think- OMG it’s overdone!!!! No it’s slow cooked on low so very tender.

No waste, little fat and it’s gone. No leftovers at all.

As I mentioned I used a small roast simply because I needed to because it called to me in the freezer, nah it really because the seal had broken and freezer burn was setting in. Never would have known that except I told you. Remember they ate it all and loved it.

I rarely have london broils that small though. Leftovers when I’ve made this before make excellent roast beef sandwiches on a crusty roll, a little horseradish, mustard, slice of smoked gouda…. yeah baby…… leftovers. Embrace them. Here in this farm kitchen I often cook dinner with the plan for the leftovers.

RECIPE

1 London Broil (or chuck or arm roast or rump roast) but really those london broils need new homes……. If you let me know you read this blog recipe remind me to give you $1 off a pound on your next London Broil!

2-3 carrots, scrubbed (peel if you want to), cut into chunks

1 medium onion peeled and coarsely chopped or handful of green onions or even some leeks

1-2 stalks of celery- use those last pieces or the limp ones hiding in the veggie drawer.

2- 4 cloves of garlic. Your preference

1/2 cup warm water

1/2 cup beef stock (or broth let’s not be too picky here).

I did not add any other seasoning but hey add some pepper or oregano if you’d like. I did not cook this with any salt but did salt to taste at the end.

Cook on slow cooker on low 8 hours or until tender. Of course you can roast in the oven also- around 300-325F covered.

Before serving strain out the broth and make a quick gravy of you like or go aujus if you prefer. Salt and pepper to taste.

I served with mashed potatoes, the carrots and some fresh applesauce.

IMG_5732.JPG

Pan seared Center Pork chops with Apple Cider Cream Sauce

This one is simply a variation of our previous recipe for Brined Chops with a Rosemary Cream Sauce that we posted in March and was in the Cazenovia Republican paper.

So if you’ve done that one the only change is the sauce now you use Apple Cider and cream, could also be done with some Hard Cider but why not drink the hard cider as you are cooking this with plain cider!

Apples and Pork go together- accept it and embrace it like we do.

Elegant for company or any family dinner.  Serves 2 but double or triples easily.   One thing to remember is when cooking the chops have a large enough skillet that the chops are not crowded or use 2 skillets when making a  larger recipe.  Crowding can lower the heat and cause them to sweat which toughens the chop.  Have enough space and adjust heat for a good constant sizzle to the pan.   Oh boy can I make chops sweat and ruin them, I now pay attention!  NO SWEATING ALLOWED!

Can you do this without brining? Yes you can but I find that brining increases the tenderness and juiciness of our leaner Pasture Raised Pork Chops that haven’t had junk added like other options you may find in grocery stores. It’s really worth the extra effort to brine them even in you can only get in a couple or hours.

2 Creekside Meadows Bone in Pork Chops  1 inch to 1 1/2 inch thickness

* can use boneless chops too but they cook much faster so be careful not to overcook.

For the brine:

1 3/4 cup water

2 tablespoon coarse salt

3 tablespoons maple sugar, tubinado or sucanat sugar or even brown sugar (light preferably)

For the sauce:

1 cup Local regular Apple Cider.

1/3-1/2 cup heavy cream or half and half. In a pinch you can use regular milk but sauce will be thin and not as flavorful. Can also replace with 3 tablespoons sour cream or creme fraiche. Sour Cream will add a bit of tang to the sauce, cream is just milder and allows more of the cider to come through. All are delicious and hopefully you have one or the other other on hand.

2 tablespoons butter.

Mix, water, salt and sugar, in small casserole or container or a sealable bag (don’t use metal), add chops.  Refrigerate 4-8 hours. Overnight can be too long so I often add these to the brine in the morning or when I come in for lunch. Thin chops need the least amount of time and I’ve brined in just a few hours for thin ones. Thicker chops benefit for a bit longer brining. Our chops we offer from the farm are usually 1” thick.

When ready to cook, remove chops, rinse and pat dry.  Allow to come to room temperature for 30 minutes.   Heat skillet on medium/high, add butter and brown chops 2-3 minutes each side.  Reduce heat to medium low.  You want them still sizzling , if too low they will seat and dry out.   Sizzle!  Cover and cook until internal 145F- 160F about 6-10 minutes.   Thinner chops may cook quicker so watch it and don't over cook them.  It's better to put them back to cook a bit more than too much!   A good thermometer is essential.  I have a nifty one with a remote and love it.  

IMG_5924.JPG

Remove chops from skillet and keep warm.  Pour off extra fat from pan and turn heat to medium high, add the apple cider, bring to a boil.   Whisk or use wooden spoon to loosen brown bits from pan.  Lower heat to simmer until reduced by half and syrupy, about 5 minutes.  Remove from heat and quickly whisk in the cream. try with 1/3 cup and taste, add in the rest of the cream to your taste. We like a bit more cream but farmers with their own family cow are like that!

 Season with salt and pepper as needed.   Pour over chops. I served with fresh apple sauce and steamed or sautéed carrots or green beans.

Thank you and I hope you can enjoy this recipe like we do. That sauce just takes the dish over the top and adds that oh yeah that’s so good factor!

IMG_5937.JPG

Sauteed Radishes, Mixed Greens and Bacon!

Did you know you can cook radishes?   They are delicious and sweet.   Bacon just takes it up a notch but is optional.

If you choose not to use bacon just substitute olive oil or lard. 

Use a heavy stainless steel or cast iron skillet.   

Amounts of radishes and greens are estimates.  The recipe is fluid so make it smaller or larger as you want.  I've had this as a lunch bowl and also as a side dish with Creekside Meadows Farm Pork Chops.

8-10 large radishes, tops removed, washed and sliced.   Thickness is how ever you like. 

1/3-1/2 pound of greens (usually a gallon bag size or a large bunch)   This can be anything  you like.  Spinach, Chard, Kale, Collard greens, beat tops.  I prefer a mix of spinach, kale, chard.  Washed and dried.   Leave whole or if they are large leafs just chop them to more manageable size.

Cook 2-3 pieces of Creekside Meadows Farm Pasture Raised Bacon in the pan first.   Remove bacon when done to your likeness.  Pour off the grease and add back 2 tablespoons.  

Add Radishes and saute for 2-3 or so minutes on medium heat until they are just getting tender.   Add the greens and stir continuously.   Continue to cook until they are wilted to your preference.    I like the slightly wilted but some prefer them reduced down to wimpy.  

IMG_4574.JPG
IMG_4575.JPG

Sprinkle bacon pieces on top and serve hot.   Usually needs NO seasoning but a drizzle of balsamic vinegar goes well or dash of tamari.

Makes a great side dish with some great Grassfed Beef or Pasture Raised Pork.  I often make this for my lunch bowl.    

Change it up!  Add in sliced carrots, potatoes, brocolli, snow peas, beans, beets and so on.   Just adjust your cooking times for different additions. 

CREEKSIDE MEADOWS FARM  Bacon, Chops and other meats - see us Saturdays at the Cazenovia Farmers Market. 


IMG_4585.JPG

The perfect Pork Chop

IMG_4570.JPG

Our pork chops tend to be lean and very meaty.  This is because of how we raise them outdoors with lots of exercise.  Why would you want fatty meat?   I know chefs and culinary experts say that fat is where the taste is BUT on meat that isn't always true.   Well raised meats like our pork and beef has the flavor in the meat, fat would add some more moisture to the meat but it's difficult to do when your animal is so active.  

This can make cooking some cuts very different than you may be used to. 

CENTER CUT PORK CHOPS

These are the classic looking chops of mostly "white" meat and a small bone.  It is very easy to overcook and I'd like to teach you how to improve your pork chops experience. 

IMG_4563.JPG


Overcooking makes for incredibly tough meat and ruins the flavor. I can overcook a chops and have dozens of times.   It happens when I walk away instead of staying focussed.  

PAN Searing and finishing Pork chops.  

I love my cast iron and yes I use it on my electric stove.  It takes some tricks but we are all skilled enough to handle this.   See me at the Farmers Market and I'm usually cooking over a butane camp stove with cast iron or a heavy stainless steel.

KEY THINGS

Pan has to be hot.

Meat has to be THAWED and room temperature.

Get a meat thermometer- found at most stores for about $10 for the most basic.  You need one now!

2-3 Center Cut CREEKSIDE MEADOWS FARM Pasture Raised Pork Chops.  

1" thickness.    If using thicker chops adjust cooking time longer by 1-2 minutes.  

Thaw your chops.   Either in the fridge on a pan of cool water.   Remove from package to a plate.  Blot dry and sprinkle with salt and pepper.   You can also coat it with olive oil before hand but I don't do this- chefs say to do it but...... it's up to you!

It can take 15-30 minutes for chops to come to room temperature.  You just don't want it cold from the fridge.   Make sure your dog can't nab the chops (been there!).

Heat the pan on the stove or in a hot oven.  Either way is fine. 

Add a splash of olive oil or lard, it will be shimmering when pan is hot enough.  If you can't tell dip a tip of the chop into the oil .    If it's a mild sizzle, it's not hot enough, if it's a splattering mess it's too hot.   Find the middle ground   A good zippy sizzle.  

Add the chops, but leave enough space between them to they aren't crowded. Crowding can lower the heat they are cooking at which will cause them to sweat which is losing moisture which dries the meat out.  

So they are sizzling away.  It takes 3-4 minutes on the first side to get a good sear.  Look for a nice brown- not too light and not burned.   Flip over the chops and brown the other side.  UNCOVERED!    

IMG_4570.JPG

Heat setting on my stove is usually around Medium high (7), Adjust the heat as you need to.

Now as you get close to that 3 minute time on the 2nd side, slip in  your meat thermometer on the side and check the temperature.   If you are at 145F.  You can pull the pan from the heat.  It's actually safe to eat at that point but it's recommended pork be at 150-160F.    Once you remove the pan from the heat, remove the chop to a warm plate and tent it with foil.  The temperature should rise to 150 on it's own.  See meat continues to cook a bit when you remove it from the heat source.  You will rest it for about 10-15 minutes- tented with foil.   This will allow time for the juices in the meat to redistribute.

IF TEMPERATURE is not 145 you have 2 choices.   Continue to pan cook it another minute or 2 OR place pan and chops in a preheated oven at 350F for a minute or two.    

You need to be checking internal temperatures.   I go no higher than 150 at the highest but prefer 145 and let it come up a little higher on it's own once removed from the heat.  

It's easier to warm the chop up to a bit higher temperature and once it's overcooked it's done with.   So go easy.   And you can have chops ready in about 6-7 minutes.  

IMG_4461.JPG

GRILLING-   

Key thing is to sear each side of the chop just like you did in the pan.  You want the chop DRY to start (or lightly coated with olive oil if you want to)    A nice hot clean grill, sear each side of the chop and then remove to the cooler side of the grill to finish.   I remove them at 145 - 150 F, tent and let them rest for 10-15 minutes.   Slather them with your sauce before removing them from the grill.   

I highly recommend a meat thermometer to avoid overcooking or undercooking.  And don't do what I do and get distracted.  Stay with the chop, time the cooking, use the meat thermometer and you will be rewarded with a delicious meal.  

SEASONINGS:    In my opinion chops don't need much seasoning other than salt and pepper.  BUT any dry rub for pork you like will be good, I go light with these so that I don't smother out the great pork flavor.    Any rub or sauce is there to enhance the naturally delicious pork flavor not smother it. 

PORK CHOPS AND ALL OUR OTHER BEEF AND PORK CUTS can be found at the Cazenovia Farmers Market   Saturdays  9-2pm June-October.  Or see us at the  FARM.  


Clear up the confusion about Dry and Wet aging

Before I raised our own beef, this goes back over 20 years ago.    I never paid any attention to how meat was raised much less butchered.  I knew nothing about aging of meat, honestly I knew nothing about raising animals.

Since then I've learned a lot and I'm always finding out something new.    What also comes with new information is controversy.   It also comes with misleading marketing to get your attention.  I get it.   I do.   I also know marketing is key to any successful business.   Farms are a business that produces a product to sell marketing is part of that business.  I'm not a marketing expert but I do have quite a bit of training lately in that area.   I wish I could just be the person raising your food but as a small operation I have to do many things.  Like write articles to share information with you, help you make the most of our products and just to let you in on what it takes to raise food  here in CNY.

We have chosen to sell not to wholesalers or restaurants but to YOU so YOU can feed your body and your family good food.   I'm taking this space to clear up a few things from my perspective and knowledge.  

All beef you can buy from a farmer either at the farmers market by the cut or when you buy large amounts like a 1/2 beef it will be DRY AGED.   Period.  Fact.  It has to be DRY AGED there is no other option for all of us selling to you.    There is Wet aging and I explain that at the end.

 It is most often USDA inspected which is a good thing.   

But what is aging about?   In the most basic of terms aging is the carcass hanging in a temperature and humidity controlled refrigerated room as it cools and then this time it is there aids in the breakdown of the muscle to increase the flavor and texture, it will also lose some moisture. 

There is lots of controversy and heated arguments abound over how long beef needs to be aged for the best result.  I avoid arguments when I can so instead I'll share how ours is aged.

Simply:  Our is aged anywhere from 9-12 days.  This is what our USDA inspected butcher prefers and with real 100% Grass fed Beef it needs nothing longer- in my opinion and talking about OUR BEEF.    Longer time actually means more loss of moisture and can result in loss of meat.   With our Grassfed Beef we don't want to lose any moisture or fat or meat, it doesn't need to lose anything!!!!

Some beef may actually need longer aging times usually because of the fat on the carcass and internal moisture which often resulted from the GRAINS and CORN it was fed.  Our beef has never been fed any grain or corn in any form at all, ever.  

Is Aging important?  Sure it is without it the beef quality will be dismal.   But it is one very small part of a multi year process of putting steak or burger on your plate.   What really matters TO US is that the animal was raised well on great grasses which is it's natural diet.  This takes TWO YEARS from birth to finish to raise good beef on grass alone in CNY.   It also takes a lot of land and some really good management from us.  Twenty years of experience is what each of us has and our son was raised on this.   20x3=60 years experience.   Something we are really proud of.

There is another type of aging that is now used and only found in grocery stores it's called Wet Aging.   You would see this as a sealed package where the oxygen has been removed and often a liquid has been injected into the package and meat.   Often that liquid is a water and sodium solution sometimes it also has sugar and seasonings.  So if you choose that package read the label and see if there is an additive.    The Wet aging since the Oxygen is removed now can be "preserved" longer so it is safe for eating for a longer period of time.   Great so the stores don't lose money when meat "goes bad" and it's convenient for you plus some food safety problems are avoided.  All those are good things.     Meat from small farms who are selling to YOU don't use wet aging, it's only done in those massive factories processing the meat.   It's not an option and not one we'd be interested in at our scale anyways.

You can decided what you prefer and what matters to you.  

Thank you for reading and I hope this helps you understand just a little of what we do and why we do it and how we do it.  

Eat better meat which nourishes your body naturally and tastes great!

How to cook the perfect 100% Grassfed Steak

Steak from completely Grass Fed Beef is a delight.   What we have found in almost 20 years of not just raising the beef but eating it is that cooking it really is really easy.    

Creekside Meadows Grassfed Ribeye with Asparagus, mushrooms and wild harvested Ramps.

Creekside Meadows Grassfed Ribeye with Asparagus, mushrooms and wild harvested Ramps.

Yes, it's easy.  What causes many problems is for decades cooking in the US has changed, yes it has.  Cookbooks are all about infusing flavor and making simple techniques seem complicated.   

Truly Grassfed Beef does not need to be infused with flavor with added marinades, dry rubs, fancy sauces.   Go simple.   Then you can play around with a bit more later on.

Steaks- always have to be thawed completely.  No exceptions.   You can thaw quickly in a cool water bath in a few hours or a few days in the refrigerator.    

IMPORTANT  Once thawed  your steak needs to come to room temperature.  This can take 30-90 minutes. 

Liberally use a coarse salt.  I like Syracuse Salt Company infused salts.  My favorites are the garlic salt, espresso salt and the alderwood smoked ones.   Or use plain salt then some fresh ground pepper.   THEN let the steaks come to room temperature.   Whenever I have skipped this step my steak has more chew than I prefer.  

Pat the steak dry.  

GRILLING:   One side of the grill should be nice and hot this is where you will sear the steak a minute or so on each side to seal those juices in. THEN move it to the cooler side of the grill to finish for a few minutes with the lid closed.    Wen cooking a thinner like 1" thick steak, this can literally take 3-5 minutes for a medium steak.  Remove to a warm plate and tent with foil.  This is also important as the juices will redistribute in the meat and not pour out all over the plate.  The steak will also continue to cook a few more degrees.

See the juices? You DON"T WANT TO SEE THIS!   I cut the steak too early and just after I took it off the heat.  Those juices are not supposed to be making a mess on the plate.  Rest the steak and no mess!

See the juices? You DON"T WANT TO SEE THIS!   I cut the steak too early and just after I took it off the heat.  Those juices are not supposed to be making a mess on the plate.  Rest the steak and no mess!


PAN COOKING:   I adore cast iron pans and use them often.  I have an old glass top electric range and yes I use cast iron on it.   I prefer gas stoves but haven't replaced this one yet.  

So the cast iron pan must be hot, a tad bit of olive oil, lard or tallow in the bottom should shimmer.    Pat dry the steak and sear on each side a minute or 2.  Then immediately turn the bunner to low.  If using electric this is stricky as it's slow to respond but gas works best.    

Let the steak finish for a few minutes, remove and tent for a few minutes.     

I found that what works even better is once the steak is seared then place pan and steak in a preheated 350F oven to finish- no lid.   Remove steak to warm plate and tent to rest.  

I prefer steak at medium but please don't go more well done as it's just not right.  The steak will be tough and dry which has just wasted our 2 years of caring and grazing for this animal plus the 9 months it's mother carried it and the 2+ years we raised that mother on the farm.  

See nothing fancy.  It's really so simple.    

Now once you have that down you can play with more seasonings if you need to.

Me?  I prefer just to enjoy that delectable full beef flavor the way it's intended.  

So where can YOU get 100%Grassfed Steak?   

Creekside Meadows Farm is the farm!   Find us every Saturday May-October at the Cazenovia Farmers Market, Cazenovia NY.  

We carry Tbones, Ribeyes, Porterhouse, NY Strip, Flank, Skirt, Sirloin.    Supplies do vary but we can fit you with a great steak or burger or chop or sausage.....

We also deliver for those times when we know your Saturday is too busy to make it to us.   AND the farmstore is open Sundays  12-2pm.   


IMG_3992.JPG
Cooking a great Grassfed Steak doesn't need a grill.    My cast iron skillet is used everyday and makes a great steak too.   From pancakes, to eggs, to veggies to steak.......... cast iron all the way baby!

Cooking a great Grassfed Steak doesn't need a grill.    My cast iron skillet is used everyday and makes a great steak too.   From pancakes, to eggs, to veggies to steak.......... cast iron all the way baby!