Honey & Apple Country Ribs

A yummy dinner for a couple.  Takes a few minutes to prep then enjoy a glass of adult beverage or a stroll while it roasts away.  

from Grassfed Gourmet by Shannon Hayes

Serves 2 but often is doubled or more here at the farm.  

1 package small Creekside Meadows Country Ribs, or double recipe for larger package.

1 tablespoon salt

1 teaspoon ground black pepper

3 teaspoons rubbed sage

1 tablespoon butter, lard or tallow

1/3 cup apple cider (or juice)

1 tart apple.  cored and cut into thick slices- skin on

1 small onion peeled and sliced into rings

1/4 cup raisins (or not)

2 tablespoons honey

combine salt, pepper and sage, rub into the meat.  Add butter (lard or tallow) to a hot oven proof skillet, sear ribs on boths sides about 2 minutes each side.   Remove from heat and add in the cider, apple, onions and raisins (or not) and drizzle honey over it all.    Roast at 350F for 1 1/2 hours or until fork tender.   

Healthy Homemade Corned Beef

Corned beef with Grassfed Beef is so easy, delicious and better for you than store bought.   

Brisket is a cut we love here at the farm.  It's one of those low temperature all day roasts that when done right melts in your mouth.  I love it because it's a put it in the oven or slow cooker and forget about it until 8 or so hours later.   Corned beef is made with brisket that is brined.   

Corned beef has always alarmed me because it's sitting in this brine in a sealed package at the store for an unknown amount of time.  Do we know when it was put in there?  And really now that I raise beef for a living I have to wonder what kind of cut needs to be in a brine for that long to actually be edible?  It's likely from an old dairy cow and so tough a few weeks/months in a brine is needed.  Ugh.  We can all do better.

Our beef briskets are in stock now and we cut them in half so are about 2 to 2 1/2  pounds each.  Most recipes call for a 4-5 pound brisket which is a whole brisket- you can do any size you want.   2 pieces brine better than 1!!!!   

Any experienced briner can talk to me about some larger briskets available at the farm. 


Onto the good stuff.:

Creekside Meadows Grassfed Corned Beef

    from Long Way on a Little by Shannon Hayes   

1 Brisket    2-5 pounds

large ziploc bag and dish/bowl/pot to hold it.   The brisket will be in this brining and ziplocs can leak. 

2 quarts water

1  - 12 ounce bottle of beer - I've seen recipes without this addition  but remember the alcohol will evaporate, it's added for depth of flavor.

1 1/2 cups coarse salt

5 bay leaves

3 tablespoon pickling spices

1 cup maple sugar, sucanat or tubinado sugar, or unrefined sugar.

6 whole allspice berries

1/2 teaspoon whole black peppercorns

1 whole star anise (I used 1/2 teaspoon anise seed)

1 large onion chopped

In a pot put water, salt, beer, pickling spices, 3 bay leaves & sugar.  Bring to boil and simmer until sugar and salt are dissolved.  Let it cool.  Place brisket in a ziploc bag and add the cooled mixture.  Place bag in a container like casserole dish or bowl in case it leaks (it can leak) Refrigerate for 5-7 days.  7 days is best.  Turn bag over every day or 2  and make sure the meat is covered by the brine.    You can also have the brisket in a covered glass container for the duration but it needs enough to completely cover it and needs to be flipp it daily.  

On morning of the day you are ready to cook it, remove the brisket and discard the brine and bag.   Rinse the brisket and place brisket in a slow cooker, add onion, 2 bay leaves, allspice, peppercorn and star anise.  Completely cover with water-1-2 quarts just enough to cover the meat.   Cook on low 8-10 hours until fall apart tender. This can also be done on stove top on low heat just make sure to keep the meat covered with water and cook, covered long enough that it's fall apart tender.  This part it hard for me because the smell is so good and I want it sooner than it's ready.  

It's so worth the time to brine your own high quality beef brisket and know exactly the ingredients.  

If you don't have pickling spices or anise, I have extra on hand to share.

Coming soon is another version with the curing salt which gives the meat more of a pink color we associate corned beef with and it also enhances the flavor.  


More Cookbooks by Shannon Hayes, fellow NY farmer and author can be found at:    http://theradicalhomemaker.net/books/  


Is it winter or is it spring?

This weekend was quiet at the farmstore with many people either on vacation, sick or attending many sport events.  It's also fairly typical of a February weekend out here in the boonies.

The store is being re-organized to make a separate space for our maple syrup finishing and area to sit and relax.  We also have added a corner spot as you enter that has most of our media articles about the farm so visitors can read up a bit about our history, recipe cards, cookbooks, soaps, popcorn and area for 2018 syrups.  I'm always lax about getting printed articles put into frames but did a bunch over the weekend.  Last year we had 2 videos shot here, more on those later.  

Sap Season is likely starting.  It's frigid this morning but the sun is out and the next few days we will have temps from 40 up into the 60's.   I may need to get out the shorts for working in the sugar shack!   Sap was dripping last night.   So how and when does sap run?   Ideally we need the sun to be out and temperatures to regularly above freezing.  In simpletst terms, this tells the trees it's spring and to start sending sap up the tree to the branches to feed the growth of leaves.  

1 year ago today the sap was running here on the farm and we were collecting sap.   So right on time. 

Saturday and Sunday Matt and Cam finished up running hundreds of feet of sap line and tapped 115 trees on our hillside.   We also have about 60 next door, so we will be making a lot more syrup this year.   Good thing because we only have 1 quart left from last year!   

Sap Season usually has it's starts and stops.  We can have some for a few days and then temperatures will drop below freezing and things will halt.   A few days or even weeks later it will start up again.    Generally once trees are tapped we have 6 weeks that the holes stay open and allow sap collection.  Anything after that the tree will grow and close the hole, if we want  collect after that it means retapping the hole which we can do in a few hours all our trees.  We haven't done this yet in the 4 years we've done syrup. 


Herb Crusted Pork Loin Roast

Pork Loin Roast

Simple an amazingly simple roast and so many ways to be prepared.  

Popular for grilling and oven roasting.  I know roasts can be intimidating and many think they take a long time or only for those fancy french chefs.   Ha.  so not true!

The thing I have found over the years is yes I can overcook these babies easily.  Key is a low oven temperature AND my newest tool.   An ovenproof remote thermometer.   See below for the link to mine.

So how do we get boneless loin roasts and why do we get them?  

Our pigs as you know are born and raised on the farm.   When they are to size we bring them to our USDA butcher for processing.  It's the only way we can legally sell our pork by the individual cut.  We've been using this butcher for over 15 years now and they do a nice job.  Almost perfect usually.

Over the years they've worked with us to help us figure out cuts that customers are familiar with and will find easy to prepare while also being the right size for meals.  

Chops and loin roasts are from the loin and many butchers just cut the loin all as chops but there are different types of chops, some have white and dark meat with more bone, some have more marbled meat but still quite a bit of bone and then there are my favorite the center cut which is the classic chop look.  White meat and small bone.

 We have only the center of the loin cut for chops, I call them center cut but I find some call them rib chops.  On one end of the loin we have cut Country ribs and the other end we have them debone a small 2-3 pound roast.  Over the years we've had to introduce customers to these cuts because they often don't see them or overlook them at the store or unfamiliar with cooking them.  It doesn't help that some cookbooks call them different things either!  

Country ribs are in the simplest term (I'm keeping it very very simple) a butterflied chop from the rib end, some dark meat, some white meat and a small amount of bone.   Quite versatile.  More on them in a later blog.

Chops- I've posted before on them and more coming soon.   

Boneless Loin Roast

I know many people are intimidated by cooking whole roast. That big hunk of meat may seem too much or you think it take too long to cook or is only for fancy french chefs- ha! It's really pretty simple and of course delicious.  

SLOW ROASTED HERB CRUSTED BONELESS PORK LOIN ROAST

2 1/2-3 pound boneless pork loin roast from Creekside Meadows Farm.  Thawed and at room temperature about an hour.  Really it's bad to put a cold roast in the oven=tough.

2 tablespoons dried Rosemary leaves- not ground.  If using ground cut in half

1 tablespoon dried thyme

1 tablespoon coarse salt

1 teaspoon ground black pepper

6 whole garlic cloves- crushed and very finely chopped

1 tablespoon olive oil

2 tablespoons lard (or butter).

1 onion chopped fine

1/3 cup dry white wine

1 bay leaf

1/4 to 3/4 cup chicken broth

1 Apple.  Preferable a tart cooking type like Granny Smith or Spy if you can, non-tart apples will be milder results but it's okay.  Peeled and diced


Grind or crumble the herbs by hand or grinder, add in the salt and garlic.   I then add in a bit of olive oil or lard, mixing with my fingers to make  slightly wet rub.   You can also do this in a grinder for a finer rub which is often better but it's up to you.  Don't stress on it.  

FullSizeRender.jpg


Our boneless roasts are netted.  Remove the net by just sliding it off, don't cut it you will be using it.  Using  sharp knife butterfly the roast, basically cut through one side and leave the other side intact so you can open it like a book.  Smear the inside with 1 tablespoon of the lard (or butter if you must).  then spread about 1/2 the herb mix all over the inside.  Fold the roast up and slide the netting back over it.   Okay if you messed up the netting use some cotton kitchen twine to tie it up nicely. 

I do this to help keep the inside of the roast really moist and add more flavor.  Some of our roasts have a good layer of fat on the outside for a juicier finish but sometimes they do get over trimmed.   It happens.   When I roast one with not much outside fat cover I use lard on the outside and inside of the roast.  So make adjustments if you need to.   

Smear the outside with remainder of the herb mixture. Rub it in really well.  This is where it helps if you made your rub really fine in a grinder so all that garlic is fine and sticks better.   

Heat up an ovenproof skillet or dutch oven, add a few tablespoons of lard or olive oil.  Once it's sizzling add the roast and brown the top and sides evenly about 2 or so minutes each side.   Get a good sear to seal in those juices BUT don't sear the bottom, you don't need to.  

Remove to a plate.  Add a bit of lard or oil to the pan.  Add in the apple and onion, cook, stirring often until the onion is soft and lightly browned.   Stir in the wine, a 1/2 teaspoon more thyme or some fresh springs and the bay leaf.  Place roast back in the pan.  Cover tightly and roast at 225F for 50-80 minutes.  Until internal temperature is 145.  If you don't have tight fitting lid use some heavy foil and seal as tightly as you can.  

Then put on your wish list a good oven proof skillet with lid or a dutch oven- no need for fancy just decent quality.  These can often be found at estate and garage sales and thrift shops instead of buying new. 

 I find it's best to have an oven proof thermometer in the roast so you can easily check the temperature and not overcook.   See below about my new thermometer.  Tent and let it rest 15-20 minutes before slicing.  

For a nice sauce.  Pour off the juices into a measuring cup, but use a strainer to get out the thyme and bay leaf,  add chicken broth until you have about 1 1/4 cups.   Pour back into the pan and simmer over medium heat.  Season with salt and pepper as needed.     

You now have the most perfect roast with a delicious pan sauce in a bit over an hour.  

FullSizeRender (1).jpg

Herb Crusted Creekside Meadows Pork Loin Roast


Delicious


Oven Proof Thermometers.   

All meat thermometers are not the same and many are just not meant to be in the oven.  You can find these at any kitchen supply place or high end grocery stores or do what I do and check out Amazon.

It's a ThermoPro TP-07    $35.955


Sap Season & updates

Sap Season is likely staring here in a few days.  Next week looks like perfect weather for the sap to start running in our maple trees.  We added on 100+ taps on our hillside.   When you come to the farm you'll see a blue line snaking it's way up the hill and into the trees. That is the main supply line.  Smaller tubing will connect the taps in the trees to the main line.  Sap will flow down hill right into our storage tank the boiled to become syrup.   

As we boil we will try to post hours when we are open for visitors to stop in and see how we do things.  Syrup will be for sale as we finish it.   

Glass Quart jars are $17  (reg. $18.50)

12oz glass jugs are $9 (reg. $10)

We also bottle in some plastic on a limited basis.   Other sizes smaller and large available by pre-order only.  Just ask.  

1/2 gallon plastic jugs are $25  

1/2 pints $5

Grading: In the past most of our syrup has been medium to dark.


UPDATES:  A lot of snow melted and now there is mud but the forecast said we will freeze later today but thaw out for next week.   Spring is getting here.  

The hay we feed the cows is getting lower and lower, less than a thousand bales left but enough until spring grazing time.  The dogs enjoy the space in the barn to play while I haul bales to the cows.  We have a slick set up this year where we are feeding them from above them.  We can toss hay into their feeders from above their heads making for easier and much cleaner work for us.

A group of pigs went to the butcher and meat coming back in a few weeks.   We still have plenty of sausage and roasts for your table so come on out and fill up.   Some nice packages to make your choices easier are available.

Did you know pigs raised outdoors store Vit D in their fat and meat, mostly in the fat.  This is why cooking with lard and cooking pork with fat is a big benefit to your health in the winter when Vit d is often lower in our bodies.  Vitamins and minerals from our animals meat is also a bio-available source unlike many supplements that your body may not be able to readily absorb.   

Plus our pork isn't in packages full of saline solutions which the industry calls sneakily "enhanced pork".    Have you seen this?   I don't hit the meat part of the store often but golly there is a lot of it out there.   Amazing and sad.  

So as you plan you meals we hope we are feeding you well.  Let us know what we can do to help make it easier for you.    We deliver in the area every week for free! 


Sausage and Veggies skillet dinner

Simple and delicious.

Creekside Meadows Sweet Italian Sausage & Veggie Skillet Dinner


I used a pound of our sweet italian sausage but this easily works with hot sausage, breakfast sausage, chorizo, kielbasa what every seasoning you want.


1 pound sweet italian sausage- Creekside Meadows Farm of course!

3-4 servings

7-8 small potatoes, or 4-5 medium.  I used red and fingerlings mixed.   Diced about 1/4" thick, nickel to quarter sized.  

1 small onion diced

2 large carrots, or 3-4 medium

1/2 cup yellow beans

1/2 cup thick sliced zucchini

large handful of spinach

In a large skillet start cooking up the sausage with a little olive oil or lard.  I removed the sausage from the casing for a crumbled sausage but you can easily just do slices also.   Once it's starting to brown I added in the onions, carrots and potatoes, cook 3 minutes then add the beans and zucchini.  Stir often.  When veggies are done add the spinach and cook until wilted. 

I added absolutely no seasoning at all.  If you aren't comfortable cooking the meat with the veggies simply cook it separately.   

As you can see there is alot you can adjust to your taste, different sausage type and all sorts of vegetables (even kale- which I detest!).  I also like this over some rice. 


It's not all about food and eating. It's about nurturing the land for our food.

It's about the land.  No matter what a farmer grows their success depends on the land and how it is cared for.    The Creekside Meadows Farmers look at our land differently than just about every other farmer in our area.   The land is where the food we eat comes from no matter if it's the potatoes, lettuce, peas or grass to feed our cows.   If that land is not cared for the nutrients in the food is compromised.

We have always been a diversifed nurturing land healing grass based farm.    
Diversified:  Because we have never and will never produce only 1 thing.   Our land is diversified and as such areas of the farm produce different things.  The wooded areas produce timber for us to make lumber to build items or buildings, the flatter grounds are mostly pasture for the grazing cows, the smaller flat areas are utilized for vegetable production, the border areas of brush and uneven ground is perfect for pigs as is some of our wooded areas and so on.  
Nurturing:  We aren't here to just harvest, take away and force the land into submission to our what we want it to do.  We look at it to see what it can be utilized for or if it needs to be left alone, how long does it need for rest periods before we utilize it again.  
Land healing:   Some areas of the farm were worked hard previous to us so we have been careful nurture it, heal it and regenerate it.  Some areas were dumping grounds that we have cleaned up.  Some areas were severely eroded due to poor crop and land management.  Creeks and ditches were diverted to move water fast away from the fields.  We have worked to correct that and let the water slow down, soak in and effective halt the erosion.  Grass is key to this.
Grass based.   Grass holds dirt in place and then dirt/soil isn't eroding away and going into a creek moving north and forever gone from the farm.  We rely on grass and other soil coverage techniques to hold our soil here and regenerate the land.

We aren't importing fertilizers for our pastures and meadows.  We have used our livestock carefully to bring back nutrients naturally to the land and using rest periods to let mother nature, the microbes, the worms, the bacteria, the fungi all that and more to bring back balance in our soils.
Have you gone by a farm that has fence and under the wire the grass is brown/burned?  That's an herbicide at use.  You will never see that here on this farm ever.    We more our fences but usually our cows graze so well they keep it clear as they should.
An educated farmer who thinks outside of conventional agriculture, a farmer who can study their land, study their plants, spend time in the outdoors understanding their animals is the one that relies not on chemicals to change things.  That farmer takes what they learned and applies it to the root of the problem.  If in an invasive weed is a problem on the land, a good farmer will take the time to understand why that plant is there, where it came from, how it grows and is it really such a bad thing?  
I know farms inundated with a particular nasty thistle plant and they chop it at it with hoes, plow it up spray the heck out of it and still it comes back.  They have never figured out why it's there or how to "attack" that plant so it doesn't want to grow there anymore.  

These are things I look for in successful farmers that I look up to.  There are very few of them.

We do our best here to be examples of smart caring farmers and this often means we aren't seen much nor recognized in the community as much.    It's because we are on our land and nurturing it.  We don't always have time to socialize and nurture some relationships that probably we should but we just can't always manage it.

This is why we have our farmstore open all winter this year so YOU can come see us at our place and soak up some of our farm's positive energy and we can take you out to see the land through our eyes.   Come on out and let us show you a little bit of our process and you can take home the bounty from the farm to nurture and feed your family.

It really matters to connect to your food and connect with your farmers on their turf-  Us farmers need it just as much as you do!


Instant Pot Korean Short Ribs

50 minutes to easy supremely tender and delicious Korean style short ribs.  Of course use only 100% grassfed Beef.
 Seriously, I am amazed how wonderful these were.  Fall off the bone tender and scrumptious.


Short ribs are often a lower priced cut and one we only carry for part of the winter.  These have always needed a low slow heat so the meat has time to become tender.  It is really worth the wait.
Some people complain  they are too fatty and on some animals they are even though all of ours are completely grass fed.

I was pretty eager to try these in my Instantpot and did this afternoon.  

35 minutes pressurized and 15 minutes natural release.   Prep time was minimal and no extra time to brown the meat.  Let me say I was concerned the recipes I was reading said no browning when all my other grassfed cookbooks and meat cookbooks said to brown for the slow roast, browning is often a key thing to bring out more flavor.  No worries they were PERFECT.

This is a hearty simple versatile weekday dinner using the instant pot when you get home or slow cooker while you are at work.    
Recipe can be doubled as long as there is room in your Instant pot.
Serves 2-3 people.

Korean Style Grass Fed Beef Short Ribs
3 pounds Creekside Meadows Grassfed Short Ribs- give or take a little.
1/2 cup hearty homemade beef broth
1/4 cup tamari  
    *If using store bought not so flavorful broth/stock use more tamari and less broth but still total 1 cup of liquid. Or use all tamari Soy sauce can be used too I just prefer Tamari
5-6 large cloves of garlic
2 tablespoons fresh chopped ginger (can use more if you like)
1/2 cup brown sugar (or honey or turbado)
3 tablespoons sesame oil
3 tablespoons rice vinegar


Place ribs in the pot.  Mix remaining ingredients then pour over the ribs.  
Use the Manual setting on your instant pot, set to 35 minutes.   Once it is done let it naturally release at least 15 minutes. Mine went longer as I was doing errands.  The keep warm feature keeps it ready for you.

Remove ribs carefully as the bones will fall off!

Pour off the liquid and use to make a light gravy or just au jus.   There will be fat that you can pour off using a fat separator or chill briefly then skim off.  
Serve over some garlic mashed potatoes!

Short ribs are known for being a little fatty and putting some people off but I found the fat MELTED making the meat even more tender and juicy.  
The "korean" style seasonings make for a very rich broth and extremely flavorful beef. 

One very simple recipe and hearty for cold frigid winters.  
Easy to do any weeknight dinner.

If not using the instant pot, I do recommend browning the ribs before adding all ingredients to your slow cooker.   Cook on low for 7-8 hours.  

Good Fat from Good Grassfed Only Beef is 
Healthy and your body needs it in the winter.  
Lots of Vitamin K2! 

Real & Simple Home Cooked Meals Challenge

Real & Simple Home Cooked Meals Challenge.   It's time to get REAL!
We at Creekside Meadows are Challenging YOU to step into your kitchen every day for one week and prepare every dinner from scratch.   Plus find out how to have leftovers and use them for lunches.

You are going to be responsible for your food preparation and using your kitchen often.  It's time to drop the fad "diets" and sourcing "cheap" foods that can't give your body the nutrients it needs.

No prepared foods
No eating out
Emphasis on local foods found in CNY this time of year.   Yup it's winter and it's possible.

We are going to detox from relying on others to prepare food for you.
You are going to get those people who are eating with you at home to have a hand it preparation.   No whining they are busy with sports or studying.  I know they are but change the behavior patterns now to having a part in preparing food so they can make better choices in the future.

We are going to:

1.   Make  a menu plan for a week so you can be prepared.  We will be posting our menu soon and will have corresponding meat packs for sale at the farm to make it easy for you to be ready for good meats for the week.  If you aren't local to us find your local farmers- they are there and many need you this time of year. Find them.

2.  Use local seasonal items.   This may mean no baby lettuce/greens that have no taste and come  in those clear plastic boxes at a store.  Step away from the empty mouthfuls of tasteless green weeds that grew far away.  Put things nutritious in your body that are substantial, not blah.

3. No going out to eat and no prepared or partially prepared meals.   
You are going to eat what is prepared in your kitchen and take responsibility for your meals and what goes into your body.   No more having someone cut up your veggies or preseason your meats or soaking your meat in saline solutions.

4.  Cut back on processed foods.  I am not saying make your own sour cream or yogurt or bread or pasta!
No boxes of mac & cheese, no cans of baked beans or soups kind of things.

5.  Meet your farmers here:
These meals will be based on locally sourced well raised meats and will feature our own because it's our blog and our challenge.   It will be truly eating like a farmer.

6.   Awakening your taste buds to simple pleasures and honest taste of food.

Are you ready?    You can do this.

Find out more about the food you buy.

Find out the stories behind our food choices here at the farm.

Find out how make small important changes in what you eat.

Find out how those changes do impact your community.

Find out what it matters to rely on personal relationships with people growing your food.

Find out why you need to look beyond a label and look at the farms here in your community.


 Come along.   I dare you!

www.CreeksideMeadowsFarm.com

Farmstore is open Saturday and Sunday 12-2pm.   Come on out!


Spare Ribs- Instant Pot Amazing!

Spare Ribs in 25 minutes with Instant Pot. Yes call me amazed and happy!

Many are like me and you love Spare Ribs but tending the grill for a long time or even just planning on a slow cook in the oven can be too much sometimes.   I already posted my oven roasting recipe that I use.

I have found a great way to enjoy Creekside Meadows Spare Ribs anytime of year and they are ready in less than an hour.

Seriously!
I have now cooked these tasty morsels twice in my Instant Pot.

My first experiment went too far with fall of the bone tenderness as in I couldn't get them out the pot easily because the bones were falling out.  They were good but maybe too tender?

So this afternoon I tried again and found a winner!

Thaw out your ribs.    If it's not done already peel off the thin membrane that's on one side of the ribs.  This requires a small sharp knife to peel the end up and then grasp it with some paper towels to slowly peel it off using the knife to loosen as needed.   Some people don't do it and were fine.  I found it's better with it off but sometimes it's already removed.  

Preseason them with a dry rub of your choice.

This last time I did ground pepper then some Syracuse Salt Company Garlic Salt and some Espresso Salt.     Maybe 1 teaspoon of each.  
Sprinkled on both sides of ribs and rubbed in.  Use more if you want, I went light.

You can use any seasoning you want, I have a bbq one that I get locally or make up your own.  You can't go wrong with just salt and pepper either.

Put a trivet in the bottom of your pot to keep the meat off the pan and out of the liquid.
Pour in 1/4 cup apple cider vinegar and 1/2 cup apple cider or apple juice and 1/2 cup water.
Why the vinegar?   I'm told it helps the tenderness but then some recipes say they didn't use it it and all was perfect they just increased the other liquid.   I'll make more and share soon.

You can also add a few drops of liquid smoke to the liquid for some smokiness.

The 1 cup or more of liquid is necessary to achieve pressure so don't skip it or it will BURN!

Place the ribs in layers on the trivet.  Our ribs are cut into 2 pieces but if you purchase ribs elsewhere they maybe 1 long piece.  If so you can curl the ribs in a circle and put on the trivet on their end so it's like a standing up roll of paper towels.  
If 2 pieces you can roll them up and tie with cooking twine or I just laid mine down flat- all was well.
25 minutes pressurized.   I used the manual setting.  Then let it do a natural release for 10 minutes.  The natural release is needed for additional cooking and aids in the tenderness.
After 10 minutes of natural release manually release the pressure and open up the yumminess.
Remove ribs, to a cooking sheet & slather on your favorite sauce.
THEN
Broil them in the oven until nice and bubbly.   Top off with a little more brushed on sauce and enjoy.  
They should be fall off the bone tender or darn close to it.    


So there you are.   Tender and flavorful Spare Ribs in less than an hour.  

Every purchase over $20 this weekend at the farm gets a free package of Spare Ribs.  
Saturday Jan 20th and Sunday Jan 21st
Noon-2pm.


Slow Roasted Eye Round Roast

Wow time has flown and I didn't get some goodies posted yet!

I cooked an eye round roast the other night and talk about easy.

Eye round is a very very lean cut and often some farms will have these cut into small round steaks and call them "tenderloins"- which they are NOT or call them mock tenders because they do resemble a tenderloin to some people.
It's packed with flavor but requires a very careful hand cooking because if it's overcooked its' ruined.

This cut is one we don't often carry but are this year because I have a goal to teach more people how to slow roast all our roasts to perfection and use leftovers!  Stop going to the deli for that stuff- cook it at home easily!

Creekside Eye Round,   about 2 1/2 pounds.   OR  Rump Roast or London Broil- which we have in stock now!
thaw and cover liberally with an herb or spice mix or just salt, pepper and crushed garlic.
I used a new product made a town over from us.
Clean Slate farms Matson hill Rub which can be found at the 20/East store in Cazenovia and other places.

I also added in some oregano because it felt right.  Plus some Baby Bella Mushrooms which needed to be used up and really beef goes so well with mushrooms.

So the roast is all covered with this  (1 tablespoons is good enough)
Let it come to room temperature.
Preheat oven to 250 or lower if you oven will do it.
Place roast in a small shallow roasting pan.
Roast on this low heat until medium (120-130 but no higher than 140) for internal temperature.  It's best medium with that nice pink center so be careful not to overcook this cut as it will go tough and flavor is lost.
It takes about 30-40 minutes per pound if you oven works well at that low temp.  Mine is not workign well at that low temp so it took 1 1/2 hours to be done.   I removed it, tented it.    Did up some pan gravy with drippings and added some beef stock because I wanted more gravy.
I slice this roast very very thin with my electric knife or a nice sharp carving knife.   Key thing is this roast is best cut really thin.   So get those knives sharpened!!!

I served with mashed potatoes, sauteed yellow beans (frozen in the fall from our garden) and some fresh warm applesauce.

Really it took 1 1/2 hours to roast and to me that is very doable for say a Sunday night dinner.  Then save the remaining meat for Monday lunches as yummy roast beef sandwiches.  Add a dolop of horseradish or some saurkraut!   Or later in the week for leftovers.  Serve over some noodles or open faced sandwiches or in stir fry on on salads, or wraps.

 This method and recipe works perfectly with a Rump Roast or London Broil as they are both lean cuts that do best roasted at low heat, only to medium and thinly sliced.

Stop buying lunch meat at the deli counter that is packed full of additives,preservatives not to mention all that salt.  One roast makes 2 meals with only a few hours cooking one time.

Many of our customers tell us that they find eating our beef is so filling that they eat less at a meal than they would normally.  It's satisfying to their tummy.   We agree.
Plus using leftovers is not just delicious but so much better for your body and your budget.
It looks like this roast is well done but there is some pink there that doesn't show in the evening picture in my kitchen.  I thought I actually overcooked it a tad but they guys here gobbled it up even with the mushrooms (they hate mushrooms but I love them!)  
 Enough leftovers for 3 sandwiches the next day from a 2 1/2 pound roast.    
See the pile of yummy roasted mushrooms?  yummmmmmy.

All the recipes are ones I have made in my kitchen and they are the actual pictures!

All our meats are ENTIRELY RAISED BY US ON OUR FARM.  

All our beef is completely 100% Grass Fed Only.
Our herd never ever gets grain, corn or fermented feeds.   They graze the pastures and then we feed hay from our farm in the winter. 

We've been grazing beef for 20 years!!!!  This year is our 20th anniversary since we obtained our first 2 beef cows.  So you have all our experience and dedication to raising meat the right way going into every bit of our meat you eat!


Thanks for the support and see you at the farm soon. Open Saturdays and Sundays all winter 12 -2  


www.creeksidemeadowsfarm.com


Or opt for delivery and online ordering with FREE local delivery!


https://squareup.com/store/creekside-meadows-farm

How to make Beef stock the fast and the low slow way!

Start with good bones from Grassfed Only cows, like ours here at Creekside Meadows.  Yes good bones do matter!

I started with 4 pounds of our Meaty Soup Shanks- or 2 packages.  These have a nice sized bone and quite a bit of meat which I like.

Thaw, liberally salt and pepper them and roast at 350 for about 30-45 minutes until a nice dark brown.    Remove to some paper towels to blot off any liquified fat.
Don't they look yummy?   All that browning will really bring out flavor in the stock.

You can also use already cooked bones leftover from meals and those don't need roasting.

Add bones to your pot.   I added 3 quarts of water to my instant pot. to cover the bones but not overfilling it (see the level mark on your pot)  Add more or less if you need to.

3 large carrots, sliced.
1 large onion, cut into wedges.  You can use more onions but I was low on supply.   If homegrown/local onions you can leave the skins as they add more flavor and have not been treated for longer storage.
1 bay leaf
3 big cloves of garlic peeled, smashed and chopped.
2 stalks of celery (optional, I didn't use for this recipe as I was out).

 
in this picture you can only see some of the bones, the rest are under water.  I'm using an 8 qt Instant Pot so for smaller pots you may use lesser amount of bones and water.  Some people make stock with no veggies but I like the more complex flavor and extra nutrients that comes from a mixed stock.

You can also add herbs if you want, like oregano, parsley, thyme, rosemary ect.....   I didn't with this batch (forgot to!)

Instant Pot.   Use the soup setting for 90 minutes and let it do a natural release.
Slow Cooker- use low for 10-12 hours, longer is better..
Stove top.  Bring to a boil and lower to simmer, cover simmer 8-12 hours or longer.

I do all 3 but lately the instantpot has saved me time, energy and seems to me to be a bit more flavorful.   This doesn't mean go out and get one, really just wait.  The price will come down and many will be found at garage sales this summer really cheap.

Strain the solids out.   If any meat I remove it and freeze for soup later on and the dogs get some for treats.  Discard the rest.

Let the liquid cool and refrigerate.   The next day I skim off the solidified fat if any and freeze in whatever serving size portions I want.  Often it's 1 cup or 2 cups.

There are lots of versions of making stock or broth and we can debate the words to use to describe it.  My recipe changes often by what I have on hand.    I like making a mixed meat stock with beef, pork and chicken bones in it.   It makes for a complex delicious stock for all sorts of uses.

I will be using this in some beef dishes this week.  Beef Stroganoff and shephard's pie!

I also reduce this down to half or more for a very concentrated product. This gets frozen in ice cube trays.  I will pull these out when I make a soup or stew or gravy that seems weak flavored and needs some extra flavor oomph instead of using bullion or similar things.


Shaved Steak Quesadillas

Shaved Steak is something I rarely see at any meat counter and I know many don't know how to use it other than Steak Sandwiches.  We have these really thin slices of steak- also called Minute Steaks- cut from either the London Broil or the Sirloin Tip.  The cook in less than a minute and work well with any seasoning or quick marinade.  I usually just keep it simple.

Here's one way that makes great little appetizers or a quick simple meal.
It's extremely versatile so add more to it since you know what your family likes.

Quesadillas with Creekside Meaodws Shaved Steak

1 pound Creekside Shaved Steak
1 package of flour tortillas  Any size you like to use.  I had some 6" for this.

8 ounces colby jack cheese- for mild   or cheddar  or a smoked type or a spicy jalapeno one.
Shred it.

Salt, Pepper, olive oil

Heat a cast iron griddle or non stick pan over medium-high heat.   Add a little olive oil.

Lay out the shaved steak on a tray, blot dry with paper towel, dust with some salt and pepper.

When pan is hot add the steaks a few at a time.  Lay them flat out.  You will brown each side.  This can take 15-30 seconds a side.  They cook quickly since they are so thin so no need to over due!

Remove to a cookie tray.   keep this warm as you work, so place in a slightly warmed oven.   Cook the next batch of steaks until all are done.

Wipe out your pan and lay 1 flour tortilla in the pan.  Use medium heat.   work quickly sprinkle a thin layer cheese over 1/2 of the tortilla, then add a layer of shaved steak and a thin layer of cheese.
 Fold the tortilla over the top.   As the cheese melts flip it over so the other side melts.   Remove to plate and cut into 3-5 wedges.


Repeat with the remaining steak and cheese.    Now you can go thicker with your layers if you wish.   Add  in any extras you like.   Arugula would be good, spinach, tomato slice, thin apple slices, avacado, cooked peppers and onion.    Change up the type of cheese to what you like or have on hand.

Serve with salsa and sour cream or ranch dressing (farmer Cam!) or whatever you like.

Again these make really nice little bites for gatherings, kids lunches, snacks.    Let me know what you do!


FARMSTORE IS OPEN   Sunday January 7th  Noon-2pm.
  We decided to close for saturday but are available by appointment.  It's the cold and we don't know if we'll be plowed out much on Saturday.

ONLINE STORE
https://squareup.com/store/creekside-meadows-farm

We have NEW meat packs for January, some revised ones from previous and all our meats by the individual cut.

Send me your favorite recipe for me to try and maybe I can post it here.   I try to keep things simple and as seasonal as I can but ready for anything (except liver, can't stand it!)


Remember your body needs to be nourished so put good things in it.  Simple things and less boxes or processed foods.  
Make your food from your home with love and not rely on someone else to do it for you is one big step towards a healthier life.  

Cooking doesn't have to be difficult, it should be simple and it can be very easy.

I know many places offer ready made meals.  We don't and I never plan to.    We want more people to take charge of what goes into their bodies by preparing it themselves.
 It's love that should go into it, positive energy and simple ingredients found locally.  
It can be done and it's why this blog is here to show you how we do it.  You can do it.

Let us help you eat better this year.

Vegetable Beef Soup from scratch in the Instant Pot

I can make 6+ quarts of stock in 90 minutes.   Is what sold me on the InstantPot.   I make alot of stock/broth here because I cook with it often.   I also don't have a particular recipe. It's roasted bones, veggies, herbs, water and go.

I've been checking out some instantpot cookbooks and find that many are just recreating stovetop or oven recipes.  Most rarely save much time and easily can ruin meat.   I'm on a FB group for newbie Instantpot owners and few can read directions and don't understand cooking meat.  

So do you need one?  If you don't have one don't go crazy trying to get one now.  Wait they will be cheap at yard sales or thrift shops soon.  I almost got one for $20 this fall.

I have one as I said for making stock/broth.  I also cook alot of large roasts  that need longer cooking times like chuck roasts, stew, pork shoulder and so on.   It's great for cooking dried beans and I've never been able to master that before .  Matt's happy because he loves chili with black beans.
it has a slow cooker feature which I have not used yet.   It has other features that I won't use like for yogurt since I have a yogurt maker or do it the old fashioned way in a thermos.   The rice feature I may use some time although we don't eat much rice here.  

I made vegetable beef soup today in under an hour which used to take all day to simmer away and here's the recipe.   I also include the super simple slow cooker and stove top way to do it.   Anyways I started soup at 11 and ate around noon.  Delicious.


Vegetable Beef Soup for the Instant Pot (or slow cooker or stove top).
I used 1 quart of beef stock as the base.  Make your own or purchase some.   Vegetable stock works great too.

1  package of 2 Meaty Soup Shanks.  OR used 1 pound of stew meat or a chuck roast cut into cubes.
1 quart of beef stock or vegetable stock.  Homemade or bought.
2 medium sized carrots, coarsely chopped
1 stalk of celery chopped
1/2 medium onion, coarsely chopped
1 clove garlic crushed and chopped
1 bay leaf

Optional 1/2 cup dry red wine
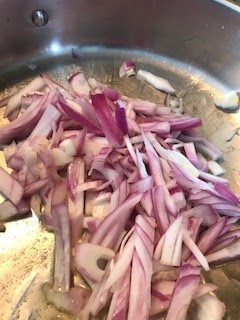
Use your instant pot instructions for sauteing.
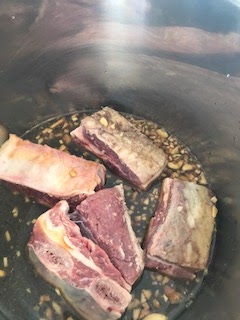
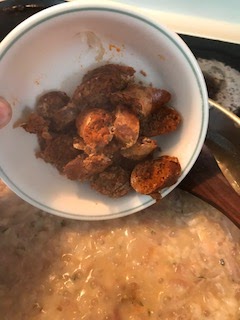
I cut the meat off the soup shank into small pieces to speed up the cooking.  I then used the saute option and browned the meat and bones in a bit of butter and bacon fat.  I browned it all well, then used some water to deglaze the bottom of the pot and scrape up all the little bits.

 Add in 1 quart of stock, the optional wine if you want to & the carrots, onion, garlic, and bay leaf.  
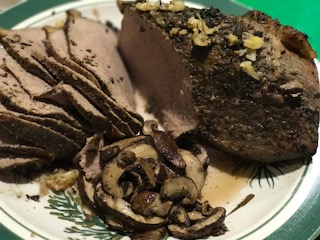
Pressure cook for 20 minutes.   Do quick release.   Remove the meat and bones.  Remove an extra meat from the bones and and pull apart any larger pieces.  Spoon out the marrow from the bones and add to the pot.  Remove bay leaf.
Add in
1/2 cup frozen corn
1/3 cup frozen peas
1/2 cup frozen green beans- I cut them into smaller pieces easy to spoon up in soup.  
2 small russet potatoes, peeled and cut into small cubes-this is optional I just decided to add a little potato for more of a "stew" kind of dish.

Pressure cook again 5 minutes and let do a natural release.  

Season soup to taste.    You can thicken it also to make it more of a stew.

I used a meaty soup shank because I had a package that the seal had broken on plus I like the extra gelatin the marrow bones add.  My knees appreciate it!

SLOW COOKER.   The meat really needs to be browned first then add all the first batch of ingredients to the pot and slow cook 6 or so hours until meat is tender.  The last 1/2 hour or so add in the peas, corn and beans, potatoes.
STOVE TOP, again brown the meat, deglaze the pan, add in all first batch of ingredients and simmer all day.  Add the corn, peas and beans the last 1/2 hour.

FREEZE in 1 cup serving amounts for quick small meals.   Excellent to have on hand when illness hits.  
EAT WELL  BE WELL

OUR FARMSTORE IS OPEN SATURDAY AND SUNDAY  12-2pm.   All winter!  
The Cazenovia Market scheduled this week was cancelled if you hadn't heard.

DRIVE UP for PICKUP!!!     I know many of you cringe at getting out of your car to get meat, who wants to drag the kids out or risk tripping on a snow ball......    Pre-order and when you drive up I will bring it to your car.   Order online with our store and pay online  OR just drop me a message with your order.  I will bring your bag to your car and you can pay from your cozy car.    Where do you get that?  Only here!

ALL ORDERS OVER $20 GET A FREE PACKAGE OF SPARE RIBS!   So you can do some oven roasting of them.

We have a great package this month.
The Creekside Oink and Moo  $150  it's about 16- 17 pounds of meat and fills a plastic grocery bag.
Includes the following:
Beef Short Ribs, Beef Chuck Roast, Meaty Soup Shanks, Shaved Steak, Pork chops (4 chops), Bacon, sweet or hot italian sausage, smoked ham steak, country ribs and 4 pounds of ground beef.

There is a smaller one featuring all the pork cuts from the 5 days of Pastured Pork recipes last week.
$65  Pork Shoulder Roast, Chorizo,  Sweet or Hot Italian sausage, pork chops (4 chops in a pkg), ground beef, ground pork and spare ribs
We also have a larger Beef pack for $200 and a Pork only one for $200  both have about 20 pounds of meat each.   You can combine the 2 for the Hibernation pack for $375 and we'll see you in March!

There are some smaller packages plus a full selection of our retail cuts.  Yes we have beef bones for stock making and a small amount of chicken backs too.    Limited supply so get them and get cooking.
We have managed to lower our price on our ground beef, sweet and hot italian sausage, and a few other cuts.  
on farm purchases this month receive 8% discount at the farm.

https://squareup.com/store/creekside-meadows-farm/

or email is   thefarmer@creeksidemeadowsfarm.com

DELIVERIES NEXT WEEK

Tuesday  from the farm west Tully, Fabius, Otisco, Lafayette, Jamesville, onondaga, navarino, camillus, skaneateles, pompey and areas in between.   No delivery fees just a minimum order of $50 for areas west of I-81.  

Wednesday afternoon   Manlius, Fayetteville, Chittenango    2-4pm drop off.   Veterans can pickup at Clear Path.

Fridays-  Cazenovia area to Morrisville.  

***Some deliveries will be postponed if weather is bad.  Sorry I don't take the truck out in bad weather but I will know the day before if things need to rescheduled.


FARM HAPPENINGS
Yes it's cold out and about to get even colder.   Luckily we may not get the much bigger storm hitting the coast but then again we might if it shifts.
The animals are all in good shape. Eating well and with good shelter so feel confident all is well as it can be.

We've been hearing of farms with frozen livestock waterers and it makes me really glad we never invested in some types  that are causing problems.  You may recall back a few years ago the water line from the well at the house under the road to the barn kept freezing in the winter.   So that was dug up and replaced I think a year and a half ago.  That water line is now larger, plastic and buried about 6 feet under!  The frost free hydrants are 4 feet and 6 feet deep also.  We hope it's enough considering it's recommended to be 3 feet deep as enough.   So those "hydrants" are a steel pipe down in the ground with a lever kind of on off handle above ground.   This we hook a small length of garden hose to and fill a 300-400 gallon poly stock tank.  It has a floating electric heater in it to keep the water warm.  So far we've had no icing at all of the tank and the cows get lots of warm water.
What many farmers use are a self waterer where the cows bump something so water fills a bowl for drinking. Those often have a thermostat in them which always goes bad, some can't find replacements for and so on.  That thermostat runs a heating element to keep it all from freezing.  Well when that isn't working you get frozen water and it ALWAYS happens when it's this cold.  Not just the waterer freezes but it will go down deep underground freezing all the water lines.   It can be replaced if anyone can dig it up in this weather.  
We decided not to buy those types of waterers.   Sure when they work they are great.  But come on things ALWAYS break at the worst times.  We like to have back up plans in place and a 3rd back up too!  Those waterers are $500 on up each and well cough cough..... we aren't spending that soon.

We've been spending some time planning the maple syrup enterprise expansion for this year.  It will involve almost tripling the amount of tree taps we will have and going up the hillside where we've been culling bad trees so the good maples can get more sun.  We have  only 2 small 12 oz jugs of maple syrup left from 2017!  

We hope you enjoy this blog and the recipes.  Send me your recipes and I'll try to feature some of them as we go along.  

Stay warm.  Eat well and nourish your body to fight off those cruddy bugs out there.
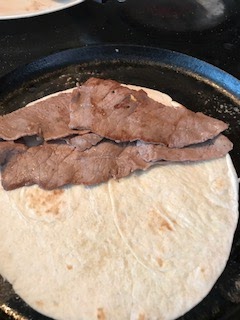
TOMORROW

SHAVED STEAK Quesadillas.   yum.  


Updates for January 3rd, 2018

So the New Year has begun and it's freaking cold out most days with more to come this weekend.   It's a tough time of year for any farmer.  I just saw my neighbor's cows be loaded up and leave the farm.  Either to an auction or sold to another farm.   I don't know the whole story but I'd guess the farm is closed.  I dread to see who takes over the land but probably better managed than lately.

It's tough here as I put on many layers to head out and take care of the critters.  Things are set up better than in years past but we still have to haul water to the pigs on the 4 wheeler.  Next year the pond WILL be finished and frost free hydrants set up at the winter pig area for watering them.

We've been chipping more wood for the cows bedding and bought some extra hay in for the pigs to eat and for their bedding.   All are doing well, and sunning themselves at the moment since it's all blue sky this morning.

It's tough on sales with zero income for 3 weeks now.  I have delivery options and farm store is open weekends now so I hope things improve soon.   A reminder what you put in your body is extremely important NOW as the dreaded illness season is here.   Put good food in and meat is very important part of winter nutrition.

A friend has had flu hit their household and she was saying she was so glad she had put up many quarts of chicken stock, chicken soup, beef stock, beef soup in her freezer.     She would get out her instant pot and put in a pork shoulder roast heavily seasoned for spiciness.   Did up a bunch of rice and put in in the fridge.  She said they have been eating well and recovering.
One favorite meal was hot sausage with veggies.  She freezes lots of veggies like I do.   She stir fried/sauteed some beans, peas, carrots, squash, onions, peppers, garlic and potatoes then added in cooked hot sausage.  Pulled out some hot sauce to clear the sinuses and dinner with lunch leftovers.   I made this during the fall at the farmers market for some of us vendors.   Yum.

If you don't have your own veggies frozen consider stocking up with some not just having fresh in the fridge.   Frozen keeps for when you need it.

So I'm going to stress to everyone get some stock made and in the freezer.   Have the pantry and freezer stocked for simple nourishing meals.

I have chicken backs and beef bones at the farm while supplies last.  
Recipe for stock will be out soon along with my favorite beef veggie soup.

We also have lots of all of our cuts and meat packs on the online store.  If  you don't see a cut or size you want just message me as i may just have it just didn't get it updated yet.
Chuck, Rump, Brisket, Stew, Meaty Soup Shanks, Short Ribs, flank steak, sirloin steak, rib steaks, shaved steak, bones, burger.   Pork shoulder and loin roasts, hams, ham steaks, bacons, ground pork, sweet and hot italian sausage, breakfast sausage, chorizo, brats, keilbasa, chops, country ribs, spare ribs ($5 a pound or free package with $20 purchase plus recipe on oven roasting or instant pot cooking them).

Local Delivery in Cazenovia Area is FRIDAY afternoons.  No minimum No delivery fees

https://squareup.com/store/creekside-meadows-farm
 to order for delivery or pickup at the farm.  
I know it's cold out so if  you are picking up at the farm and don't want to get out of the car NO PROBLEM.  Put in your order ahead of time.  I will bag it up and let you know the total. You can pay ahead of time or when you pickup.  I WILL BRING IT TO YOUR CAR when you pull up!

See toot your horn and we bring you good meat.   You can NOT get that anywhere else!

Seriously I know many of you have kids and don't want to drag them out of the car or you are iffy on walking on uneven ground- I've been there a few times.    So let me make it easy for you since I have the heavier winter gear!  

I also have delivery next week east of the farm, west of the farm too.  
Tuesday from the farm west to Skaneateles and Camillus and in between.
Wednesday is Manlius, Fayetteville and Chittenango
Fridays (every friday) is Cazenovia and west to Morrisville.

I also delivery EVERY Friday locally in Caz and Deruyter and other really close areas to us.

Put good food in your body and wash your hands.   Stay well.  See you soon.


The classic pork chop

I adore pork chops, breaded, grilled, pan seared, shakenbake, they are just delicious.  
The key to this love affair is never overcooking them and it is so easy to do with good pasture raised pork.
1.  These chops are NOT packaged in saline and sugar laced "juice".
2.  They come from animals that have been outdoors doing stuff, running around, living it large in the sun and rain and snow and doing pig stuff the way pigs should.  Not in a climate controlled barn over slats of manure pits or or just dark dank barns that I know some local farms do.  
3.  The meat is lean and flavorful it doesn't need much just a light hand cooking it.

Our chops here at Creekside Meadows are the lean center cut, usually bone in although sometimes we do offer boneless.  The tenderloin  is not left on like a t-bone chop.  We usually have them cut at 1" thickness.

I have 2 recipes but only pictures of one because well I had a hankering for breaded chops yesterday and decided to do all of them as breaded but will share the other recipe that I've come to love.  Don't the fancy title (rosemary cream sauce) intimidate you it's really simple.

Okay back to breaded chops.   You can always go the easy way and get a box of ShakeNbake, I do it every once in a while then wonder why did I do that when it has so many additives?


BREADED PORK CHOPS
Thaw the chops either in the fridge or a quick cold water thaw in the package.   Pat them dry and liberally do some coarse salt and ground pepper.   If you like the Syracuse Salt Company try some of their flavored salts like a spicy siracha one or the roasted garlic.  
Let the chops come to room temperature.

This is where I do them differently than most recipes.  I dip them in either melted butter or plain yogurt then roll them in my bread crumb mixture.  Some recipes have you using seasoned flour and eggs for dipping which are all good but I go for simple and less dishes to clean.

3/4 cup bread crumbs - I use seasoned pankos or seasoned bread crumbs.  Plain is fine.  Homemade is even better!
1/4 cup parmesan cheese   (out of the container or fresh grind some if you do that)
1 tablespoon dried parsley.  I've also used italian herb mix, oregano or smoked paprika

roll the buttered or yogurt dipped chops in the breadcrumb mixture.  Press it into the meat.


Place on a wire rack on a cookie sheet/roasting pan and roast at 350F for about 30-40  minutes.  If using thicker chops it will take about 45-60 minutes.  
You want an internal temp of 145, the higher the temp the more likely they will over cook so check them at 30 minutes and see if they need a a few minutes longer.
See how they are still a juicy!  Meaty and crunchy is a good breaded chop.

Note the oven temp is 350F   when most recipes will say 400 or higher but that's for not as good of pork as we have!


BRINING CHOPS

I've only recently played a bit with brining and find that I do like it when I can remember to do it.
This recipe is adapted from Shannon Hayes Long Way on a Little cookbook.   Shannon introduced me to brining and let's all say Thank you!   Brining really makes for a juicier chop and one that is easily pan cooked without drying out plus you can make yummy sauces!

Brined Chops with Rosemary Cream Sauce (it's easy!)
1 3/4 cup water
2 tablespoons coarse salt
3 tablespoons maple sugar, turbinado, sucanat or brown sugar
2-3 chops.   1 inch to 1 1/2 inch thickness (I do 1 inch)
1 tablespoon lard or butter
1 cup dry white wine or meat broth.
1 1/2 teaspoon dried rosemary
3 tablespoons sour cream

Thaw the chops first.   In a medium bowl mix water, salt and sugar.  Add chops and refrigerate 4-6 hours.  Remove and pat dry.   Dump the brine down the drain.  You can now cook with them or refrigerate them for 1-2 days for later cooking.

Let chops come to room temperature about 30 minutes.  As in lock the dogs OUT of the room because mine love chops (bad dogs with good taste!)

Heat a heavy skillet on high heat.  Melt the lard.  Pat dry the chops and add to the pan.  The pan should be large enough to cook the chops all at once with space between them.  If not then just do 2 batches so they don't crowd and not cook properly.   Or use 2 pans which is what I've done for 4 chops.

Back to the pan full of cooking chops- cook 2-3 minutes each side then lower heat to medium/low, the chops should be doing a gentle sizzle sound if not increase the heat as they will just sweat and dry out.   So listen for the sizzle since I didn't my first time and well we had ruined chops.  It was a bad day.    Cook for about 10 minutes or internal temp of 145.   Remove from pan and set aside.

Delicious & Simple Sauce:  pour extra fat from pan and bring heat to medium-high.  Add wine or broth and rosemary to the pan.  Bring to boil, whisk and scrape up all the brown bits from the bottom of the pan, simmer until reduced by half and syrup like (5 minutes).  Turn off heat then whisk in the sour cream and season to taste with salt and pepper.  
Pour sauce over chops at serving.    Don't you feel fancy!  When I make a sauce I feel accomplished and hey!  I made a fancy pan sauce like the chefs on TV.

The original recipe calls for carmelized pears but seriously sometimes that's just too much for me to handle.   I rarely have pears on hand unless in the fall and we prefer fresh warm chunky applesauce and some sauted green beans in little garlic butter for sides.


As we end 2017 I'm busy planning more posts packed with things about how we raise the meats we sell and helping make it easier for you to be comfortable cooking them.

I don't focus on the perfectly balanced diet but more of finding balance, eating more with the seasons (and from our freezer) and keeping it simple, doable and delicious.  Putting good food on the table for our family isn't easy with all we do here at the farm and people often expect farmers to have awesome meals all the time.  I'm here to say it AIN'T SO!!!!   We often have burgers of pancakes for dinner because they are fast and simple.   I know some will gasp where are the vegetables??? OMG they are only carnivores.  Ha, yeah no we are harty omnivores.  This blog is focused more on cooking GOOD MEAT from our farm.

See in a few days as I get  some things caught up around the house and plan some more recipes to share that fit January in CNY.  Remember the farm store is open Saturdays and Sundays Jan-April so come get some good meat right from our farm.

www.CreeksideMeadowsFarm.com  
You an email me at :  thefarmer@creeksidemeadowsfarm.com

Chorizo White Bean Stew

Time for a warm you from the inside out simple stew you can make in less than 30 minutes!

We have a fresh Chorizo sausage at the farm custom made with our pork.  It's a mexican style as opposed to the spanish style that I think is a smoked sausage.  
When we started carrying this I was unfamiliar with this seasoning.  I'm a boring Central NYer and little experience with mexican cooking so I've been experimenting with it.   Customers have loved it and it's becoming a very popular sausage for us.
It's spicy but not hot if you know what I mean.  Anyways I often cook it with veggies and potatoes for a quick skillet dish or some in scrambled eggs.  
I found this new recipe from bon Apetit Magazine.   It is really simple so I tried it recently and I think it's a keeper.  It's a very simple one to make and I think it can be added to to improve it.  

The recipe called for white cannellini beans and sadly I couldn't find them at the local swanky health food place so I got some canned Great Northern Beans. Similar and close enough for me.   I'm not sure the taste difference between the two so chime in and inform me if you know.  I do know I really am not a big fan of canned beans much anymore.  You will find them in my own pantry cabinet because it's  good thing to have quick things on hand.   I now use my instantpot to pressure cook dry beans and LOVE IT!   Seriously I don't really care for beans all that much except for green beens from the garden and I think it goes back to canned are just blah to me.  
Anyways I used canned ones this time.  Next time I'll try to cook up some dried ones if I have time.  Key thing being if I have the time, you know how that is.

This dish is spicy but hardy.  If spicy isn't for you please just use some sweet italian sausage and make it yours.  I also think this could have some carrot added to it.   One for the added color and one for some veggies in it.  Those of you who are kale lovers I'm sure would add kale instead of spinach, or brocoli rabe or whatever other green in the fridge.

Chorizo & White Bean Stew

1 pound Creekside Meadows fresh Mexican Chorizo Sausage
1 large onion thinly sliced
4 garlic cloves finely chopped
1 spring of thyme or some dried leaves (about 1/2 teaspoon)
2  15 ounce cans of cannellini (white kidney) beans, rinsed
   (or cooked equivalent)
2 cups chicken broth (I prefer homemade)
Salt and pepper
Baby Spinach (about 5 ounces)
 (or other greens )

Heat a tablespoon of olive oil, butter or lard in a large skillet on medium heat, add sausage and cook until browned and cooked.  Can also be done in the oven .  I cook the sausage in the casing and slice after cooking.

Add more oil to same skillet.  Add onion, garlic and thyme.   
Cook, often stiring until onions are soft.   Add beans and broth, crush a few beans to thicken sauce. 
  Heat 8-10 minutes so it thickens.   Add spinach, let it wilt about 2 minutes, stir in sliced chorizo.  

Add water if it needs a little thinning.   Salt and pepper to taste but it may not need much since canned beans have salt and chorizo is packed with seasoning.
Can be drizzled with a little olive oil and smoked paprika at serving.

Make it 1/2 hour and in one pan AND with just a few staple ingredients.

I think this is one of those meals to keep some canned beans on hand for and some cooked sliced sausage in the freezer.  

Will kids like it?  If they like spicy then yes.  If they don't like spicy use the sweet italian sausage instead which is what I would do plus again I'd add some thinly sliced and diced or shredded carrot but they I love carrots!

Enjoy.


Day 3 and it's gearing up for New Year's!

I'm getting ready for New Year's eve at the farm. It's not a big day around here, no parties or stuff like that.  We are homebodies but I do tend to do a finger food kind of spread.

I have 2 recipes today because I can't decide which one I like better.


OVEN ROASTED SPARE RIBS

1 rack of Creekside Meadows spare ribs.  Thawed
BBQ dry rub of your choice.   I found a local one that works nicely for us.
It's Wild Billi's and it's from Truxton NY so just around the hill from us.  I found it at the Deruyter BigM but I think Nelson Farms carries it and I'm sure some others.
Anyways it's a low sodium, no msg mix and I have the mild version.   There are spicier ones too.

Back to the ribs.    Pat those ribs dry and liberally cover with your favorite BBQ rub or just go simple with Salt and Pepper.

Preheat oven to 200.  Place on a cookie tray or baking pan and place on middle rack.  On rack below fill a bread pan 1/2 way with water.  This will give some moisture to the roasting and help break down the collagen so they are fall apart tender and moist. I've done it without the water and they were not as juicy so don't forget the pan of water!

Roast about 8 hours.  Then slather with your favorite bbq sauce and finish under the broiler OR fire up the grill for a quick smokey finish (I often do that in the warm months)

This can also be done in the slow cooker, I just add a bit of water in there and let them cook away.


  BONUS TIME!

SWEET and SPICY Mini-Meatballs

I made these last year during the winter farmers market and they were a hit so it wasn't just us who are fans of this one.  It's crazy simple and there are many versions you will find online.   Hands down extremely popular with the kids at the market and hungry farmers sneaking samples!

I make my own meatballs and NEVER ever buy them but you do what you must.  I know we are all busy.  These can easily be made ahead of time and frozen for any meals or snacks like these.

1 pound Creekside Meadows Ground beef
1 pound Creekside Meadows Ground Pork
1 cup breadcrumbs
2/3 cup finely chopped onions
1/2 cup milk
2 eggs
2 teaspoons worcestershire sauce
salt and pepper
Lard, butter or Olive oil for frying
10 ounces grape jelly (or raspberry)
12 ounces chilli sauce

Mix the meat, breadcrumbs, onion, milk, eggs, worcestershire, 1 teaspoon salt and 1/2 teaspoon pepper.   Mix well and form into 1 inch size balls.  Cocktail Size and  you should get about 48.
Heat the pan and oil on medium/high heat.  Fry the balls until browned on each side and cooked about 5-7 minutes (145 internal temp).  It may take a bit longer and do this in batches.
Drain on paper towels.

OR
Oven Roast
400F. Line a rimmed baking sheet with foil and set a wrack on top (so juices drain from the balls).   Bake at 400 for about 20 minutes, careful not to overcook them.  You want them cooked through with a bit of a crispy edge.  


SAUCE
Mix the chilli sauce and jelly in a saucepan.   Heat on stove until hot.  
Add the meat balls and let them simmer a few minutes to warm through.  
This is where I put it all in the crockpot or other warming dish for serving and keeping warm.  Put out some toothpicks and watch them get snatched up
Do ahead.
Make the meatballs,  cook then freeze.    Just warm them in the sauce before serving. 

Isn't that pretty easy?  Think of how you could prep these for all sorts of dishes and have them frozen for quick meals or snacks.   

Time to make my meatballs because we are snacking on them Sunday night along with some ribs!